Lunges are great to take care of one leg at a time and really concentrate on pumping blood into the thighs. This exercise is also fantastic if you’re just starting out with fitness training and want to build a base and prepare your lower body for exercises like squats and deadlifts. And this is where bands come into the picture. When you do lunges only with your body weight it will get really easy really quick. Bands are a great tool to add resistance.
In this article we will cover how to perform a perfect lunge with bands, as well as what other variations you can incorporate in your training. We will also cover how you can progress by adding more resistance and multiple tips we came up with by training with resistance bands for years.
We start by showing you the right way of doing lunges. In the second part of the article we then cover variations and great tips to help you maximize your performance and get a great workout.
Lunges With Resistance Band
Then here we go, let’s get your lunges game to the next level!
Band VS Weights & Machine
Doing your lunges with a resistance band gives you several advantages over doing them with free weights.
- Don’t leave results on the table! You are leaving results on the table by using either the wrong resistance bands or the wrong workout plan. No worries, we got you covered – take our free workout plan tailored for your goals here and make sure to check out our perfectly tuned set of resistance bands here.
- Follow the natural strength curve of your muscle! The resistance of a band will always increase the more you stretch it and that’s also the natural strength curve of your muscle, having the most power in the full contraction. With free weights, you often fatigue in the expanded part of your muscle without fully fatiguing the whole muscle.
Especially in the starting position (bottom position) we are weaker than in the finishing position (top position). Band are perfect, since they provide less resistance at the start of the movement and maximize the resistance at the end where we are the strongest. - Fewer Injuries & Home Workout! You probably don’t have a home gym with a lot of weight at your disposal and doing lunges with weights take quite a lot of time to develop the right technique to be able to handle more weight without risking injury – with resistance bands you can do lunges at home with minimal equipment and very safe, since band force you to perform the exercise in a good form simply by using them. Automatic injury prevention. Nice!
- Versatility! With one band you can simulate a variety of resistances depending on the stretch and also use it to train your whole body.
There are also more reasons to favor resistance bands over traditional free weights or machines, like reducing the stress on your joints, getting more peak contraction, and many more. But we’re talking here about doing lunges, so if you’re interested in background info about what benefits resistance bands give you in strength training and muscle building, check it out here.

How To Do Lunges The Right Way
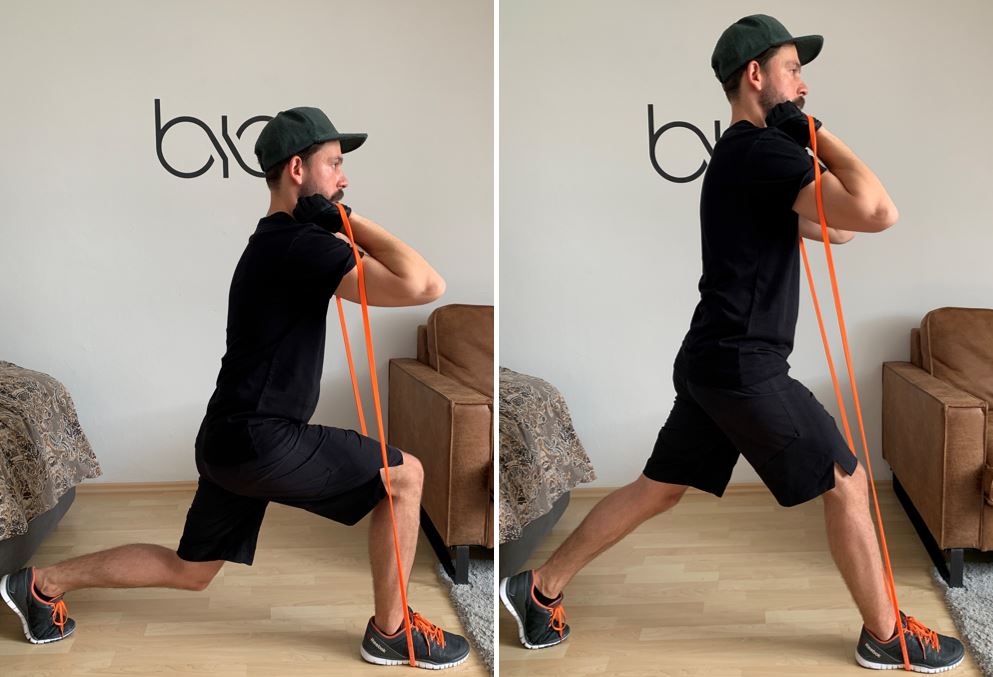
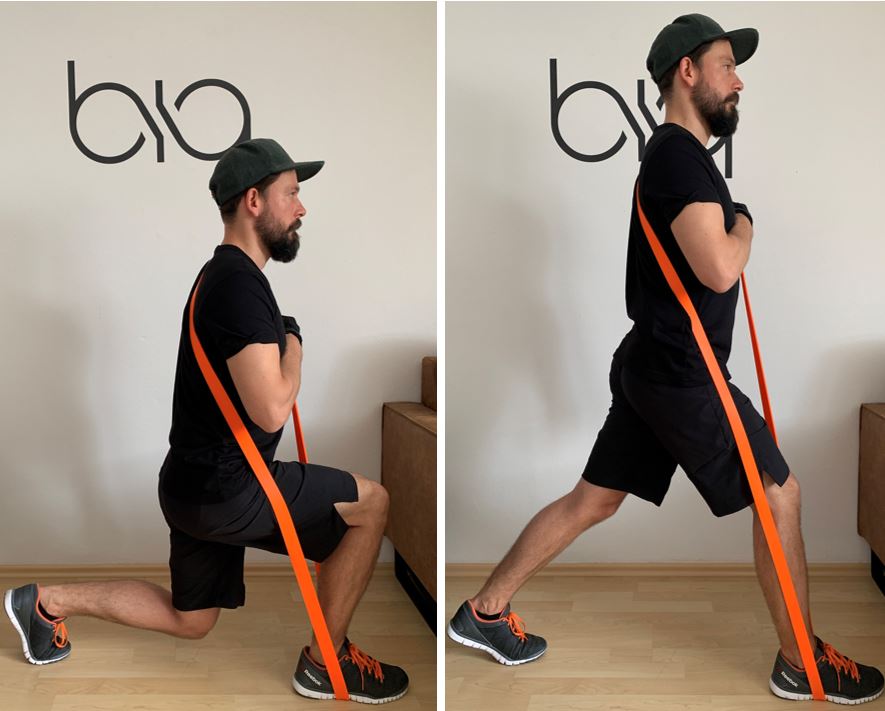
Lunges are quite basic and really straight forward exercise. There are some Do’s & Don’ts which we gonna cover further below. In this section we will show 2 basic alternatives how to perform a lunge with resistance bands. The fundamental steps go like this:
- Double up the band and step on it with one foot
- Step backwards with the other foot
- Grab the band with both hands
- Take a big breath and hold it
- Initiate the movement by bending your front knee
- Go down until you touch the ground with your back knee
- Explode back up to the starting position

The doubled up band set up is the one we recommend. You might need to grab one of the lighter bands. But it will ensure that you can fully focus on the movement and it certainly the most comfortable way of doing lunges.
The basic alternative would be doing it with one a not doubled up band. You can either grab the band really close to your front foot and let the rest of the band loose, or you bring the band in a front squat position. For that simply grab the band and bring your hand to your shoulders.
That’s basically the lunge folks. Not too complicated in theory, but it takes quite some time to perfect the form. There are actually many tweaks to this exercise that I have listed below so make sure to check them out 
Important Do’s & Don’ts!!!
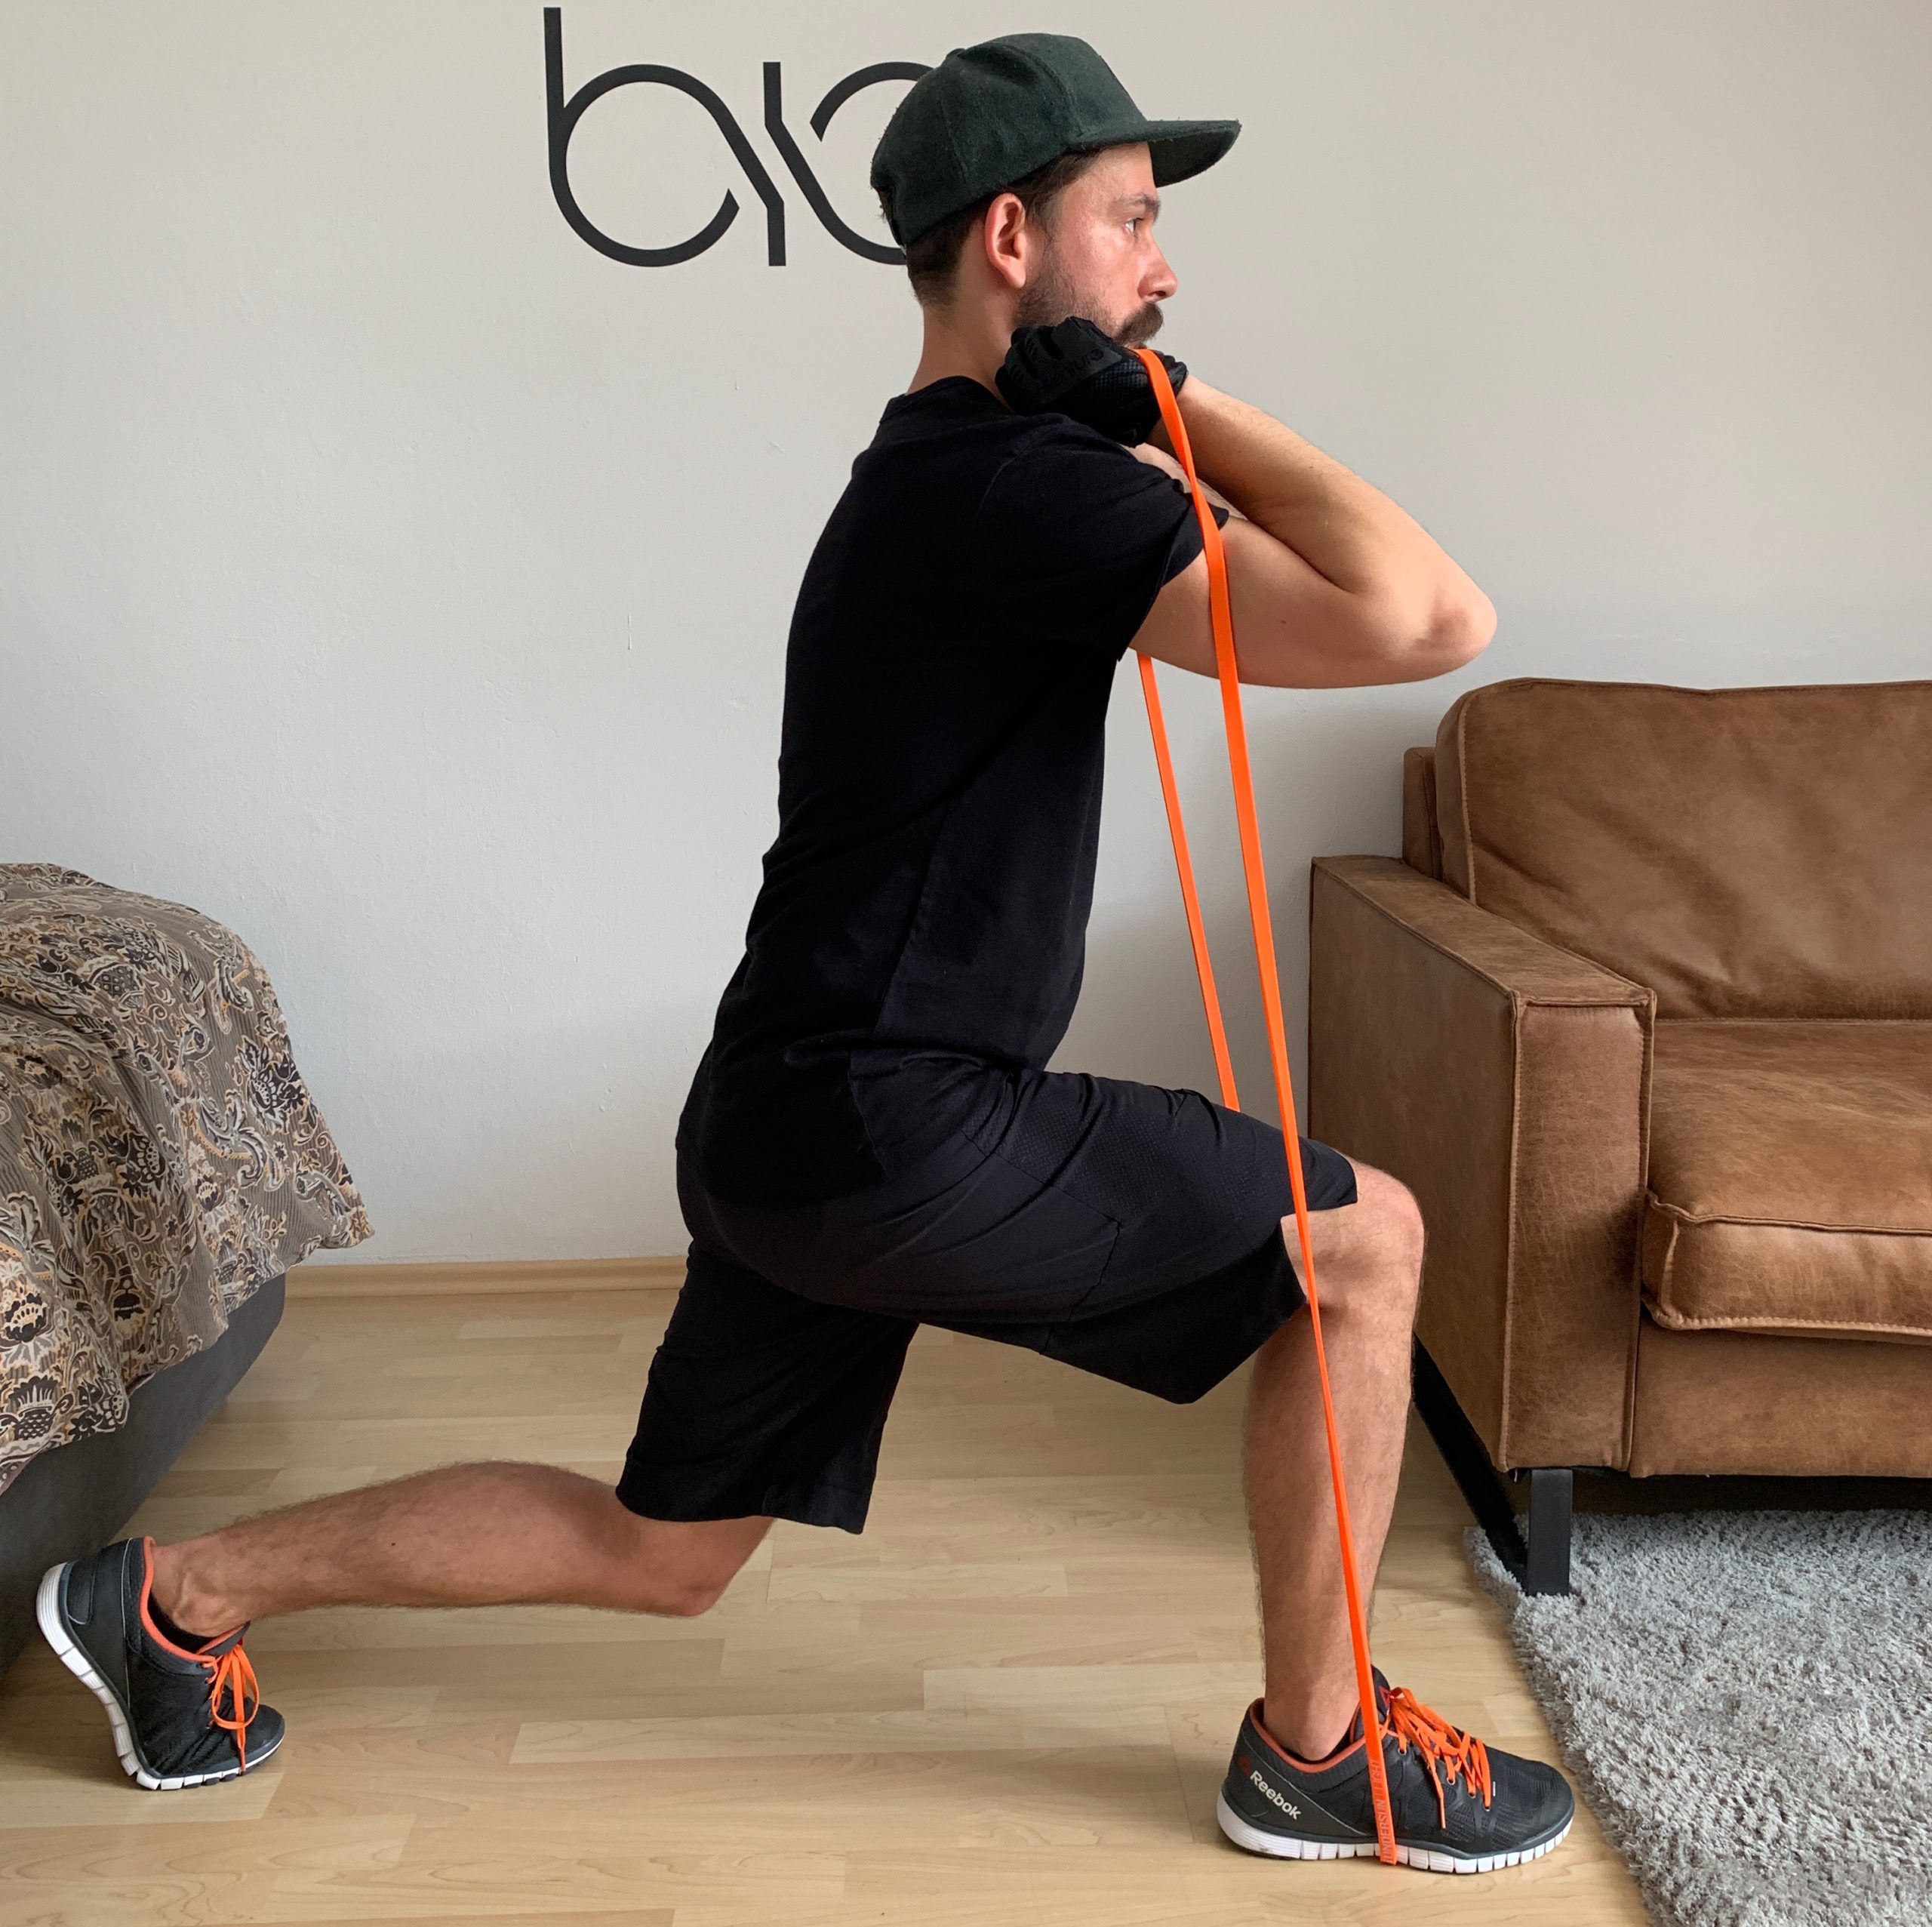
⓵ No Slack – when you’re in the bottom position of your lunge, there shouldn’t be any slack in the band. The band should be stretched a little bit so you feel a force pulling you down a little bit. If you have a slack here you will lose a lot of time under tension!
If it is not possible for you to stand up completely without having a slack at the bottom position you need to use a lighter resistance band (below you find tips how to increase the force with a lighter resistance band)
 ⓶ Foot Position –Since all of us have different bodies and therefore the legs have different length there is no fixed distance you should position your legs in. But it is quite easy to determine. Start without any resistance. Now split your feet apart and perform a lunge.
For a perfect stance 2 things are important. In the bottom position your front knee should be behind your toes. And your rear leg should be in an about 90 degree angle when you touch the ground with your rear knee.
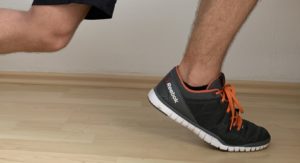
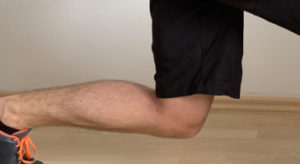
⓷ Keep Your Front Heel On The Ground – don’t allow the heel of your front foot to leave the ground.
The heel is the most effective contact point to the ground to drive the force when you lift yourself up. Not having the heel on the ground is the most-common mistake most people do with lunges (with or without resistance band), so pay close attention to that.
We have the best workout plan for resistance band training out there - and you can get it for free!Answer the 4 questions below and we send it to you, no strings attached!
Alternative Ways To Lunge With Resistance Bands
With every version of an exercise, you will find people that really like it and others that don’t like it that much. If you have problems with the recommended version of doing the lunge as shown above (while executing it the right way) or simply want some variety, you might want to try one of the following lunge variations.
Band Over The Shoulder – With this setup you will have your hands free. You will be able to fully focus on keeping your balance and keeping your lunge from in check. Simply step on the band with your front foot and place the other end on top of your opposite shoulder. Lunge!
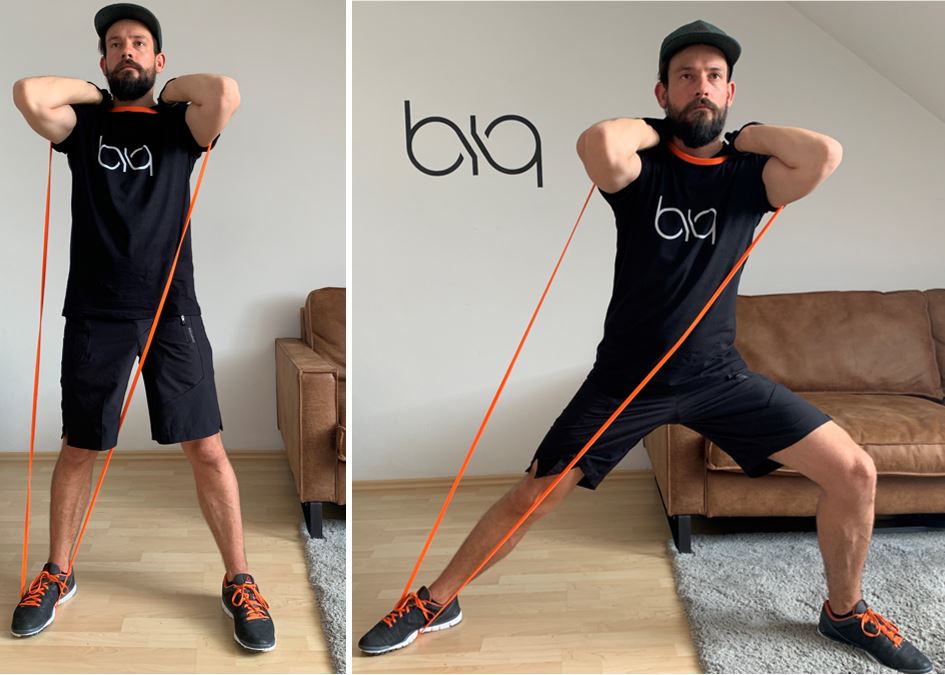
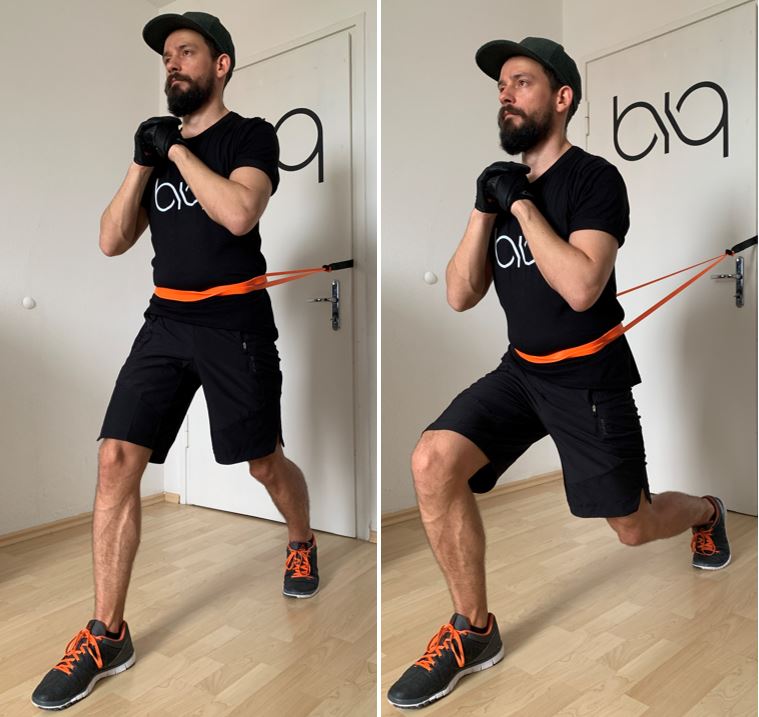
Lateral Lunge – This variation is great to mix it up and not letting your body get used to the lunge movement. Also you will hit some side leg muscles the lunge doesn’t cover as good. Step on the band with one foot, grab the band with both hands and bring your arms into a front squat position. From here step to the side with your free foot. Go down until your thigh is parallel to the ground and explode back up to the starting position.
Mini Band Lunges – Great for toning and warming up. Grab a mini band and place it slightly beneath your knees. Now perform the lung as described above. As a bonus lift your rear leg up after each lunge to give that butt an extra notch of resistance.
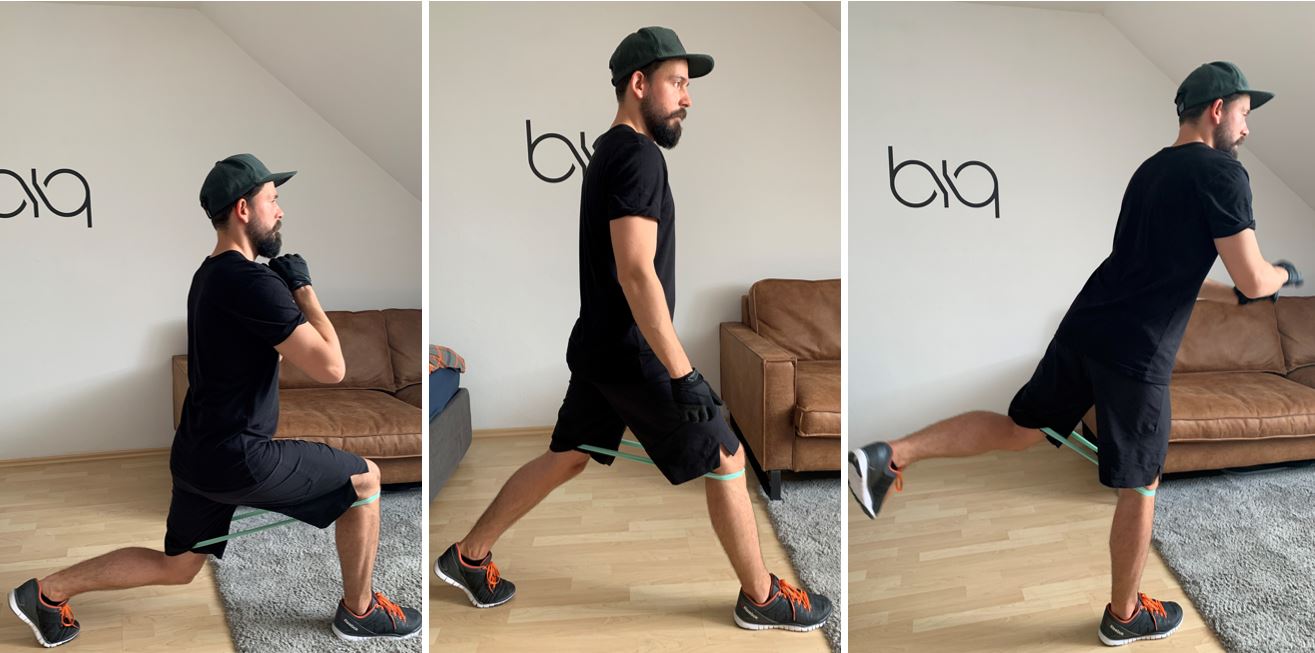
Assisted Pistol Squat – Not a Lunge but also a unilateral leg movement. And a great one as well. This is actually progression from a lunge, since it will challenge your balance and you have only one leg at the ground. Bands are great to get started and have some assistance. Fix the band at a point in front of slightly higher than your head. Grab the band and step back until you have some tension. Get one leg off the ground and drive your hip backwards while bending the knee of your other leg. The band will assist you not to fall over backwards.
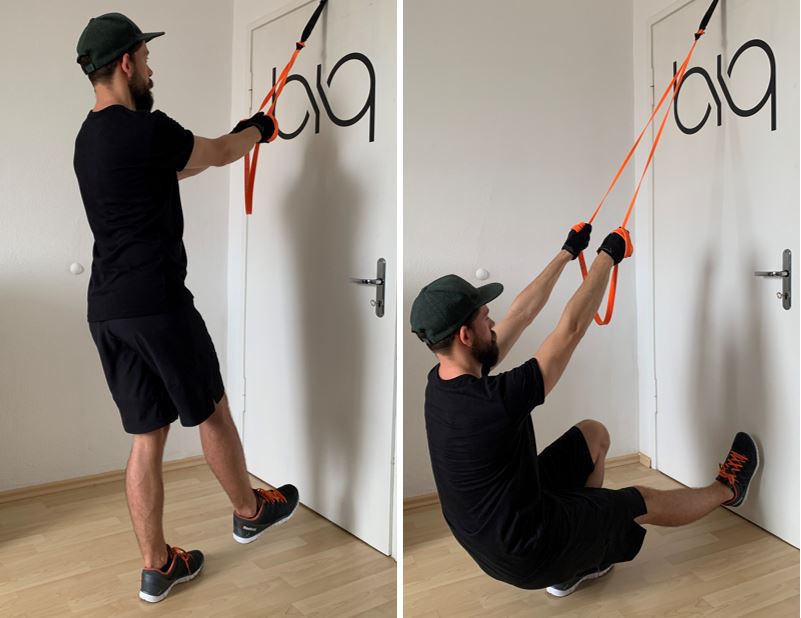
In the bottom position make sure that your knee of the ground leg is behind your toes. From here explode up by driving force through your leg, try not pulling on the band. This will take resistance from your leg and make the movement easier since your back will assist you. We don’t want that.
Assisted Lunge – If all the variations we covered so far are still too hard for you and you are just getting into fitness, this one gets you covered. With this set up we will make the body weight lunge easier. The band will assist you in getting back up from the bottom position and support your balance. Fix the band behind you around your hip level. Step into the loop and place the band around your hips. Step forward until you feel a tension in the band and some force pulling you backwards. Now perform the lunge as described above. The band will help you to get your first reps and prepare you for the more difficult variations.
Get Your Pump
If that doesn’t get you that pump, here are some tips that will help you work that butt and thighs to the ground.

Shorten The Band – many people make the mistake to use a band with a resistance level that’s simply too high for the exercise. The full effect of bands results from getting the right resistance and if you use a band that’s too heavy you can’t get a clean range-of-motion and clean reps and get lower progress.
Instead of taking a stronger band simply shorten the band, you use and you can do that perfectly by wrapping it around your hand or foot once or twice and get the extra resistance without losing the ability to do clean reps.
That’s also one reason why I don’t like the resistance bands with handles attached to it and prefer the loop-style bands.
Double Time – If you feel that there is only a little bit of resistance missing and a jump to the next thicker band would be too much, simply add a second one of the lighter ones. It will give just that extra resistance you’re looking for without taking it over the top.
Time Under Tension – compared to weights where you have the same force applied to any position of the movement, bands will add more resistance the further you stretch them – this will lower the time under tension your muscle has during a set in the starting position. Focus on doing the exercise controlled and try to hold it for a second or two in the fully contracted position and don’t let the band snap back but slowly go back to the starting position.