Important Dos & Don’ts
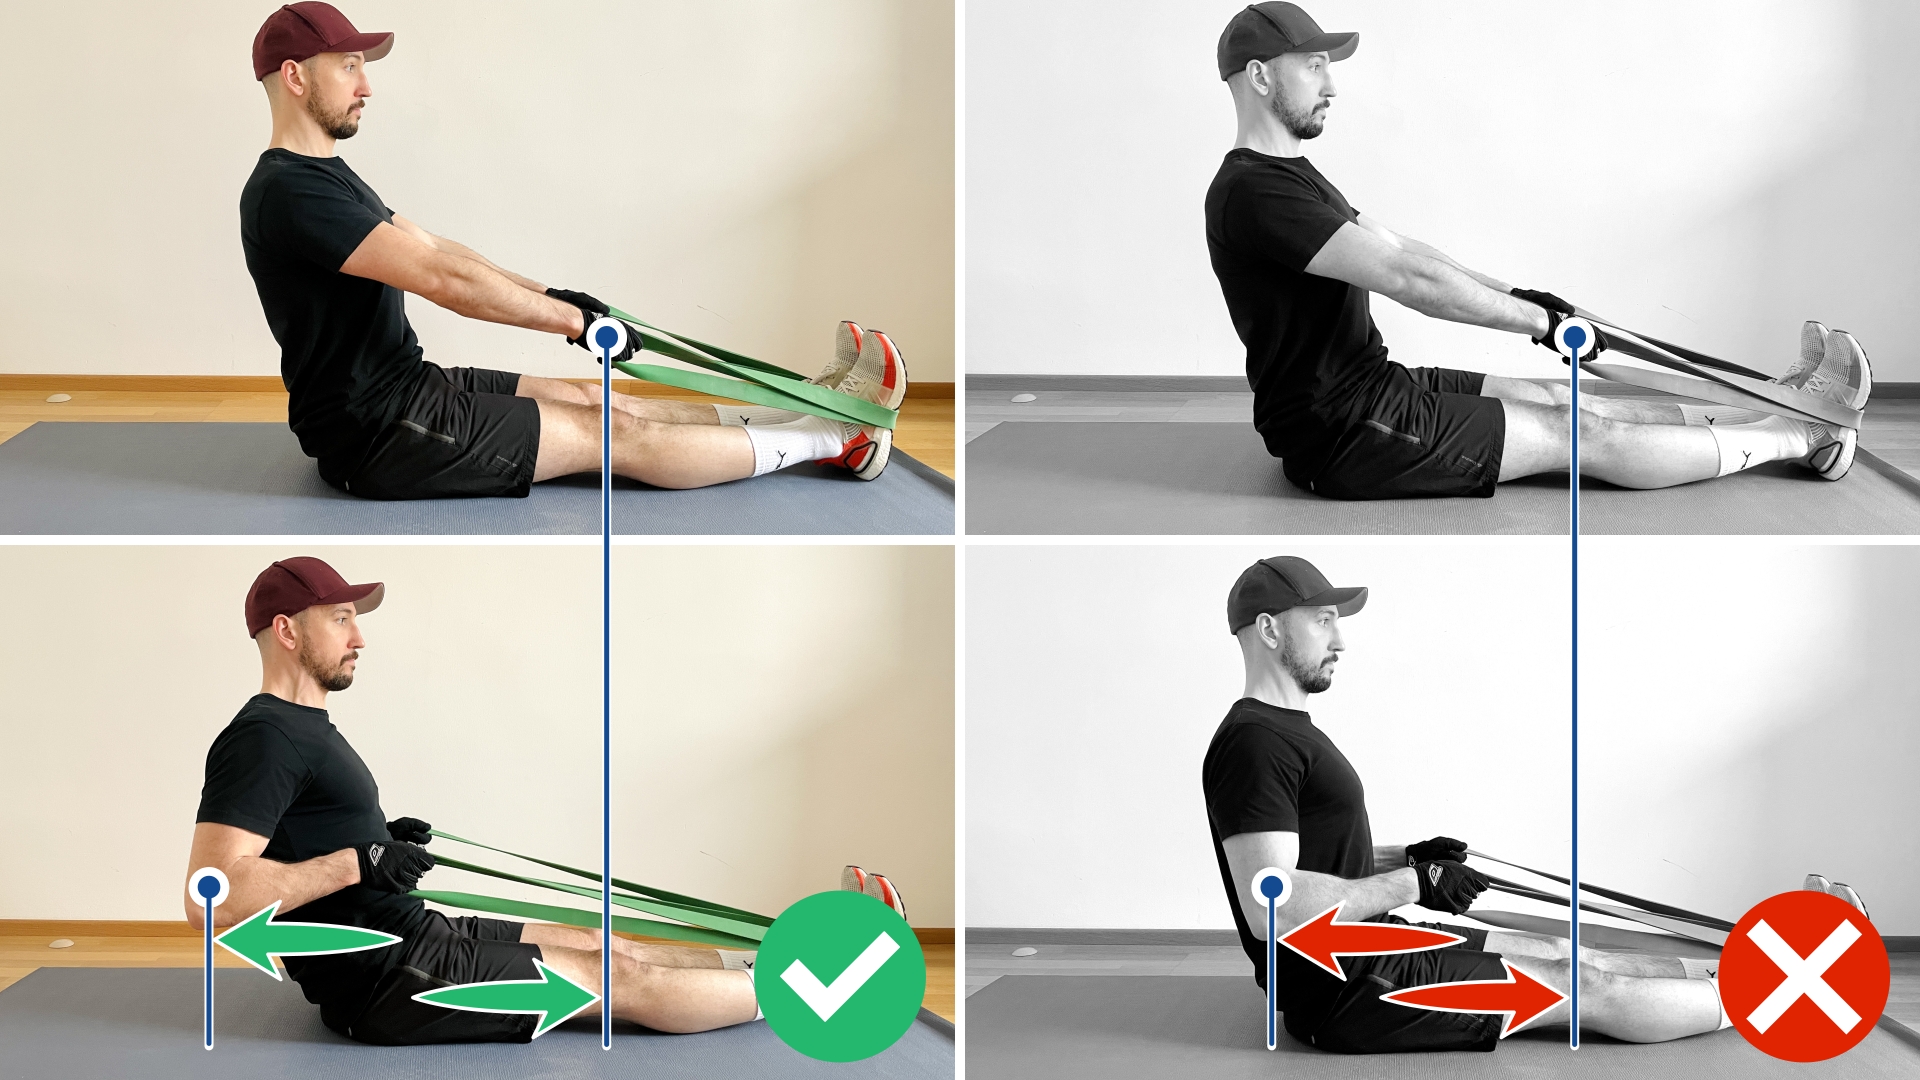
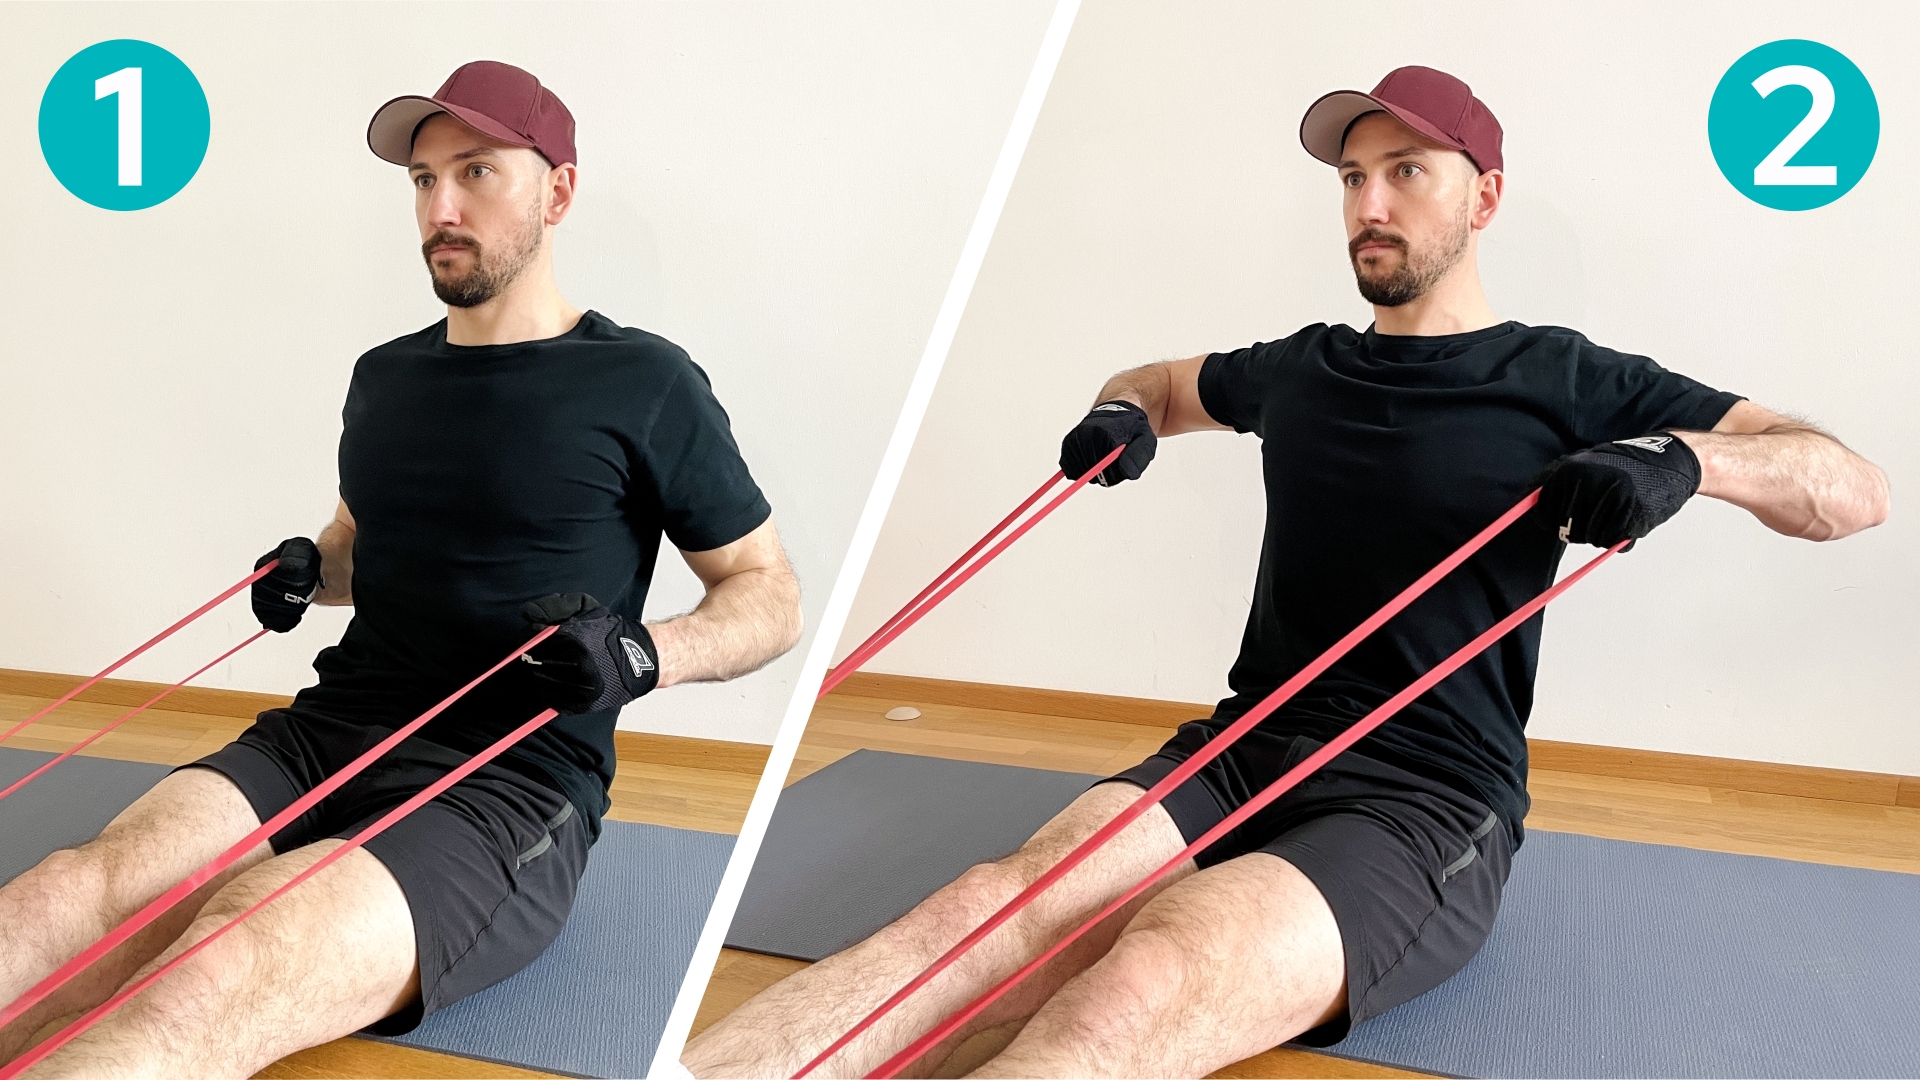
⓵ Shoulders back and chest out – quite common with rows is internally rotated shoulders. Basically, your shoulders are pointing forwards. This position is a very weak position and puts stress in places where it should not be, like your neck and rotator cuffs. This can even result in unnecessary injuries which are totally avoidable. Bring your shoulders back and down, and fix them in this position. Also stick your chest out, this will bring your shoulder blades together.
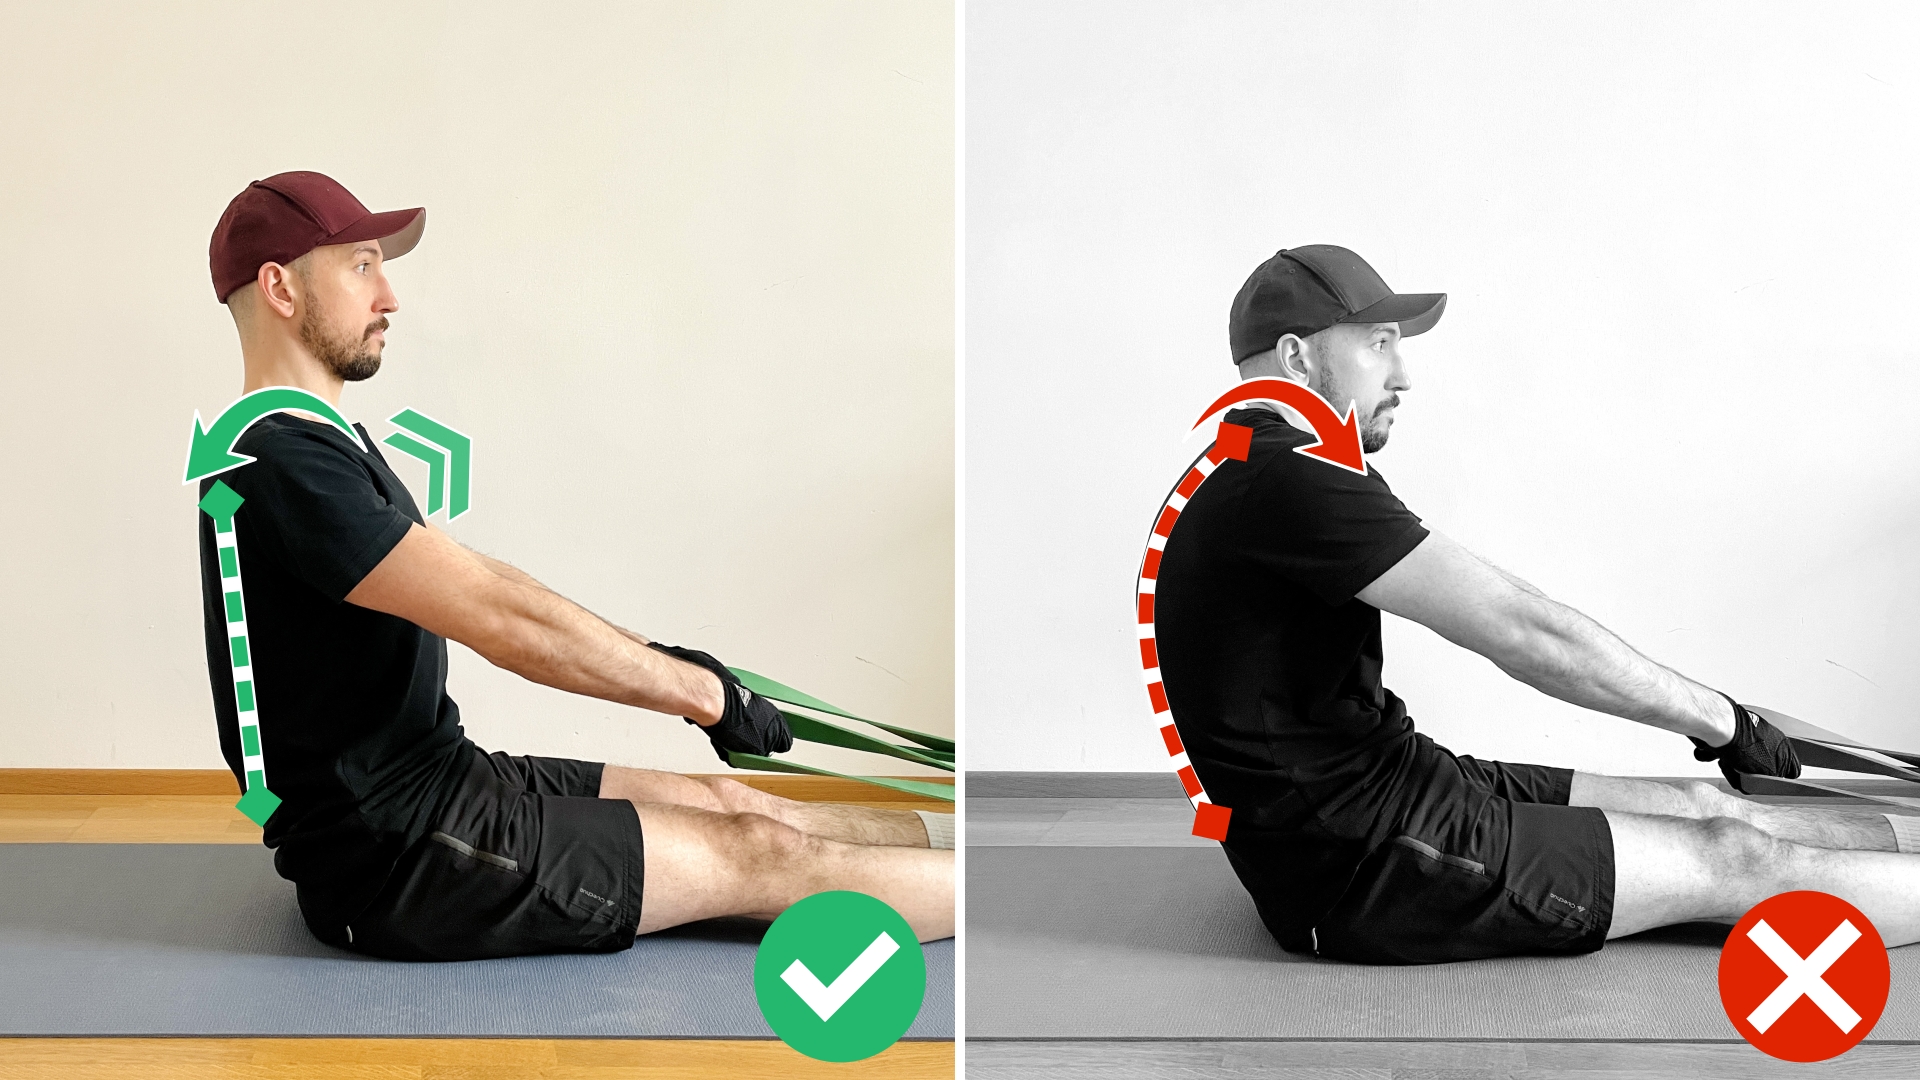
The same applies for the end position of the positive movement of the row.

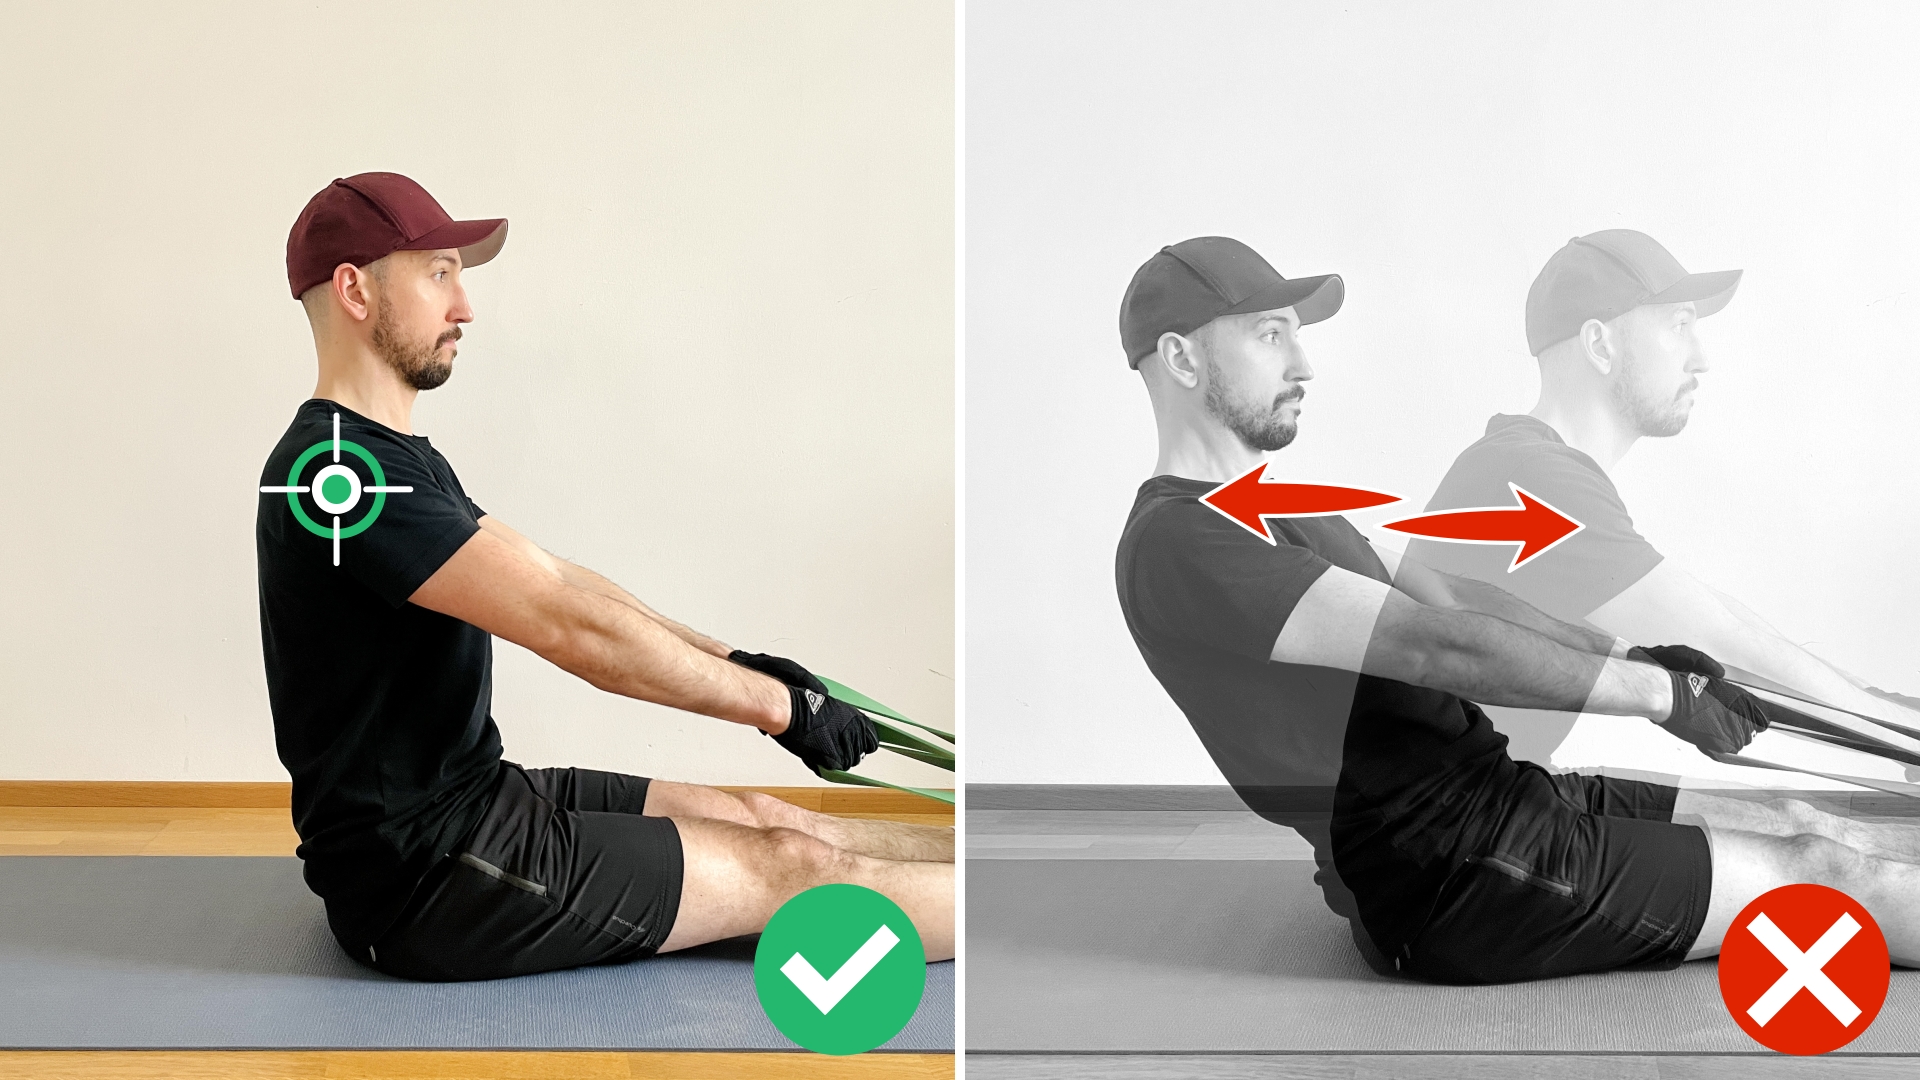
⓶ Avoid upper body forth and back movement – with rowing, especially when using a heavier band with more resistance than they can handle, people tend to start moving forth and back quite much with the upper body to gain momentum. This is a mistake that will cause you to make this exercise less effective, so try to keep your upper body as straight and locked in place as possible while pulling your elbows back as much as possible. A little movement is ok and is actually good to stretch your lats in the eccentric part of the exercise.
⓷ Keep tension in the band at all times – if there is slack in the band in the starting position, you are leaving results on the table. If there is no tension in the band, there is no resistance your muscles have to work against. If you can’t do a complete rep without slack in the start position, you need to use a lighter band and shorten it. In the next section, we will show you how to adjust the resistance of resistance bands.
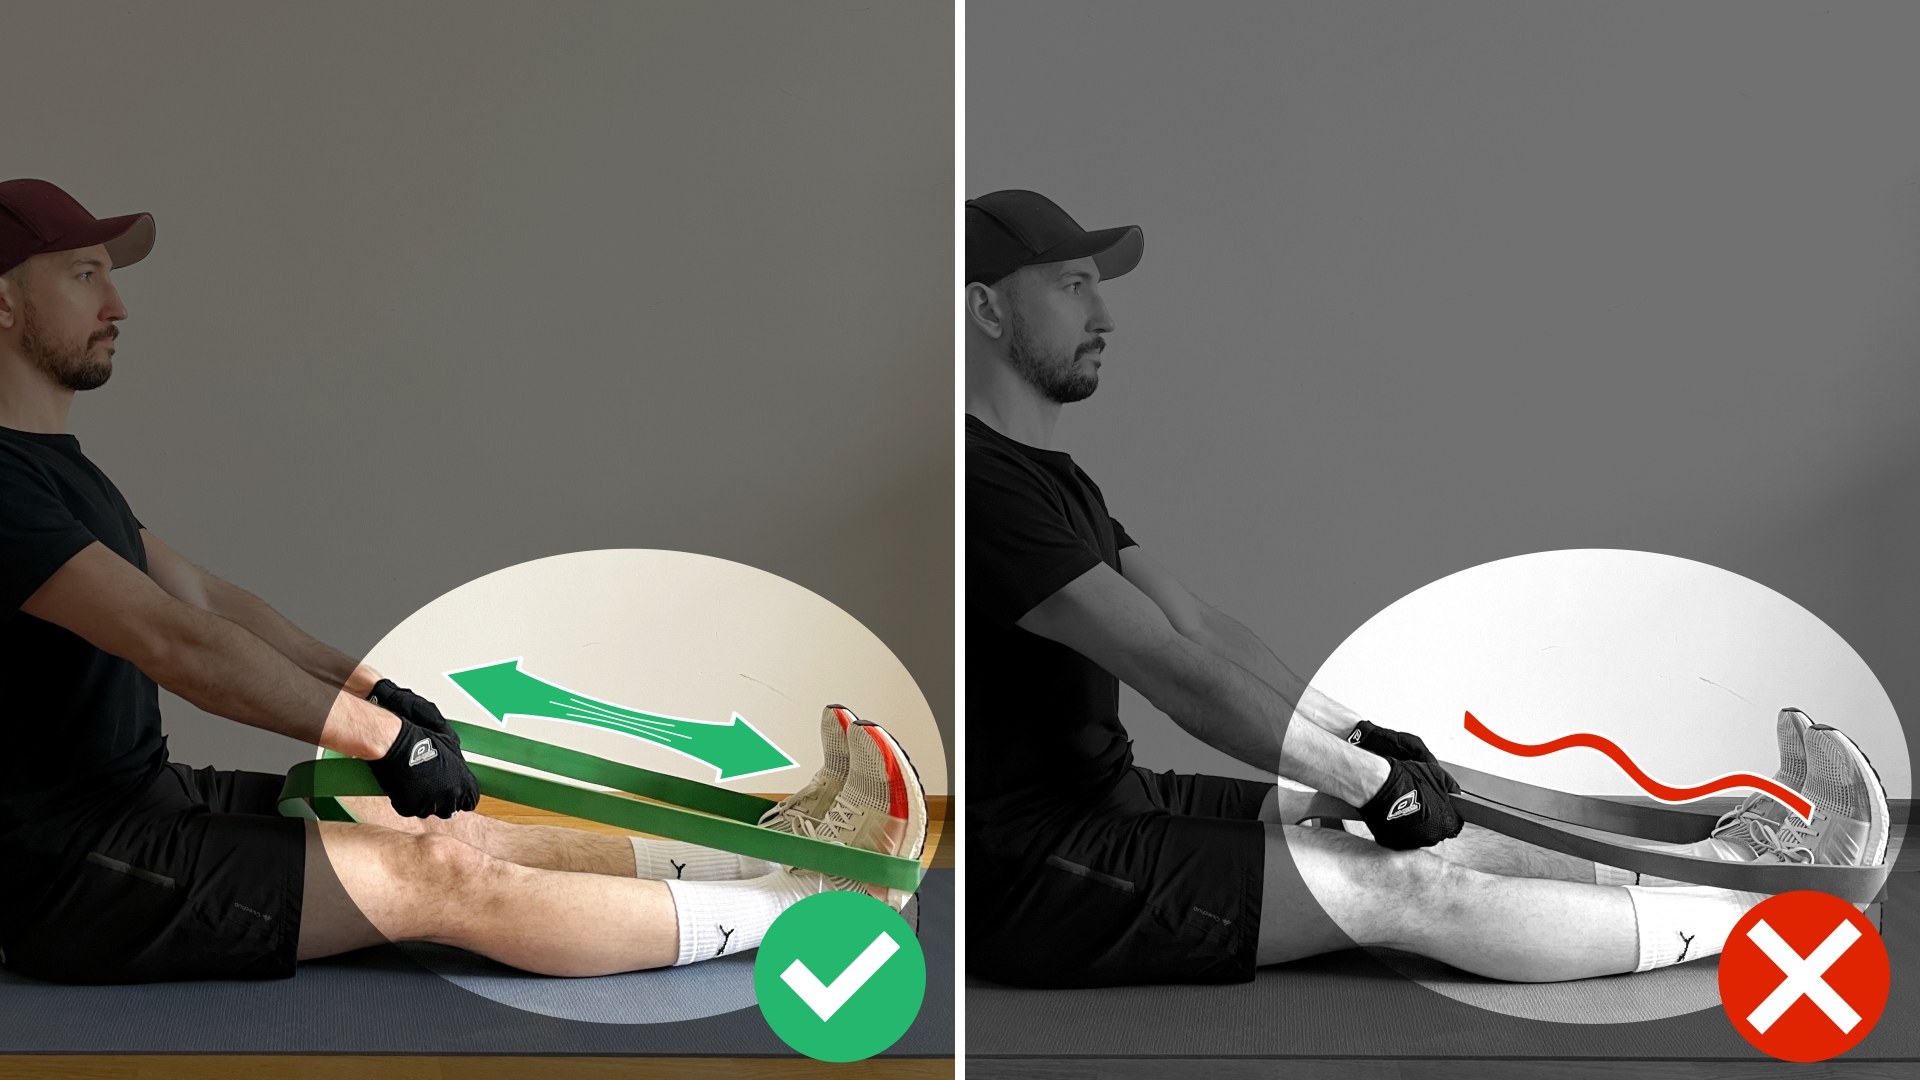
⓸ Controlled reps and full range of motion – controlling the movement and being controlled by the band is always a good idea. This will actually make your muscles work more and makes the exercise more effective. Especially the negative part of the row – where you bring your hands towards your feet – is where your back has to work very hard.
Also, always aim for a full range of motion. This means starting with fully extended arms and moving the elbows back until they are behind your upper body (from a side view).
How To Adjust The Resistance
One of the biggest advantages resistance bands have over weight is the option of adjusting the resistance of a single band. Bands have the characteristic that the further you stretch them, the more resistance they will generate. It is a good idea to use the full potential of one band before switching to the next heavier one.
The best methods to do that for seated rows are:
Single band vs. double band – So far, you’ve seen the version where you double the band and use each end as a handle. Of course, you can do seated rows by only using a single string setup. This will reduce the resistance quite drastically, but it gives you the option to adjust the resistance to your current level.
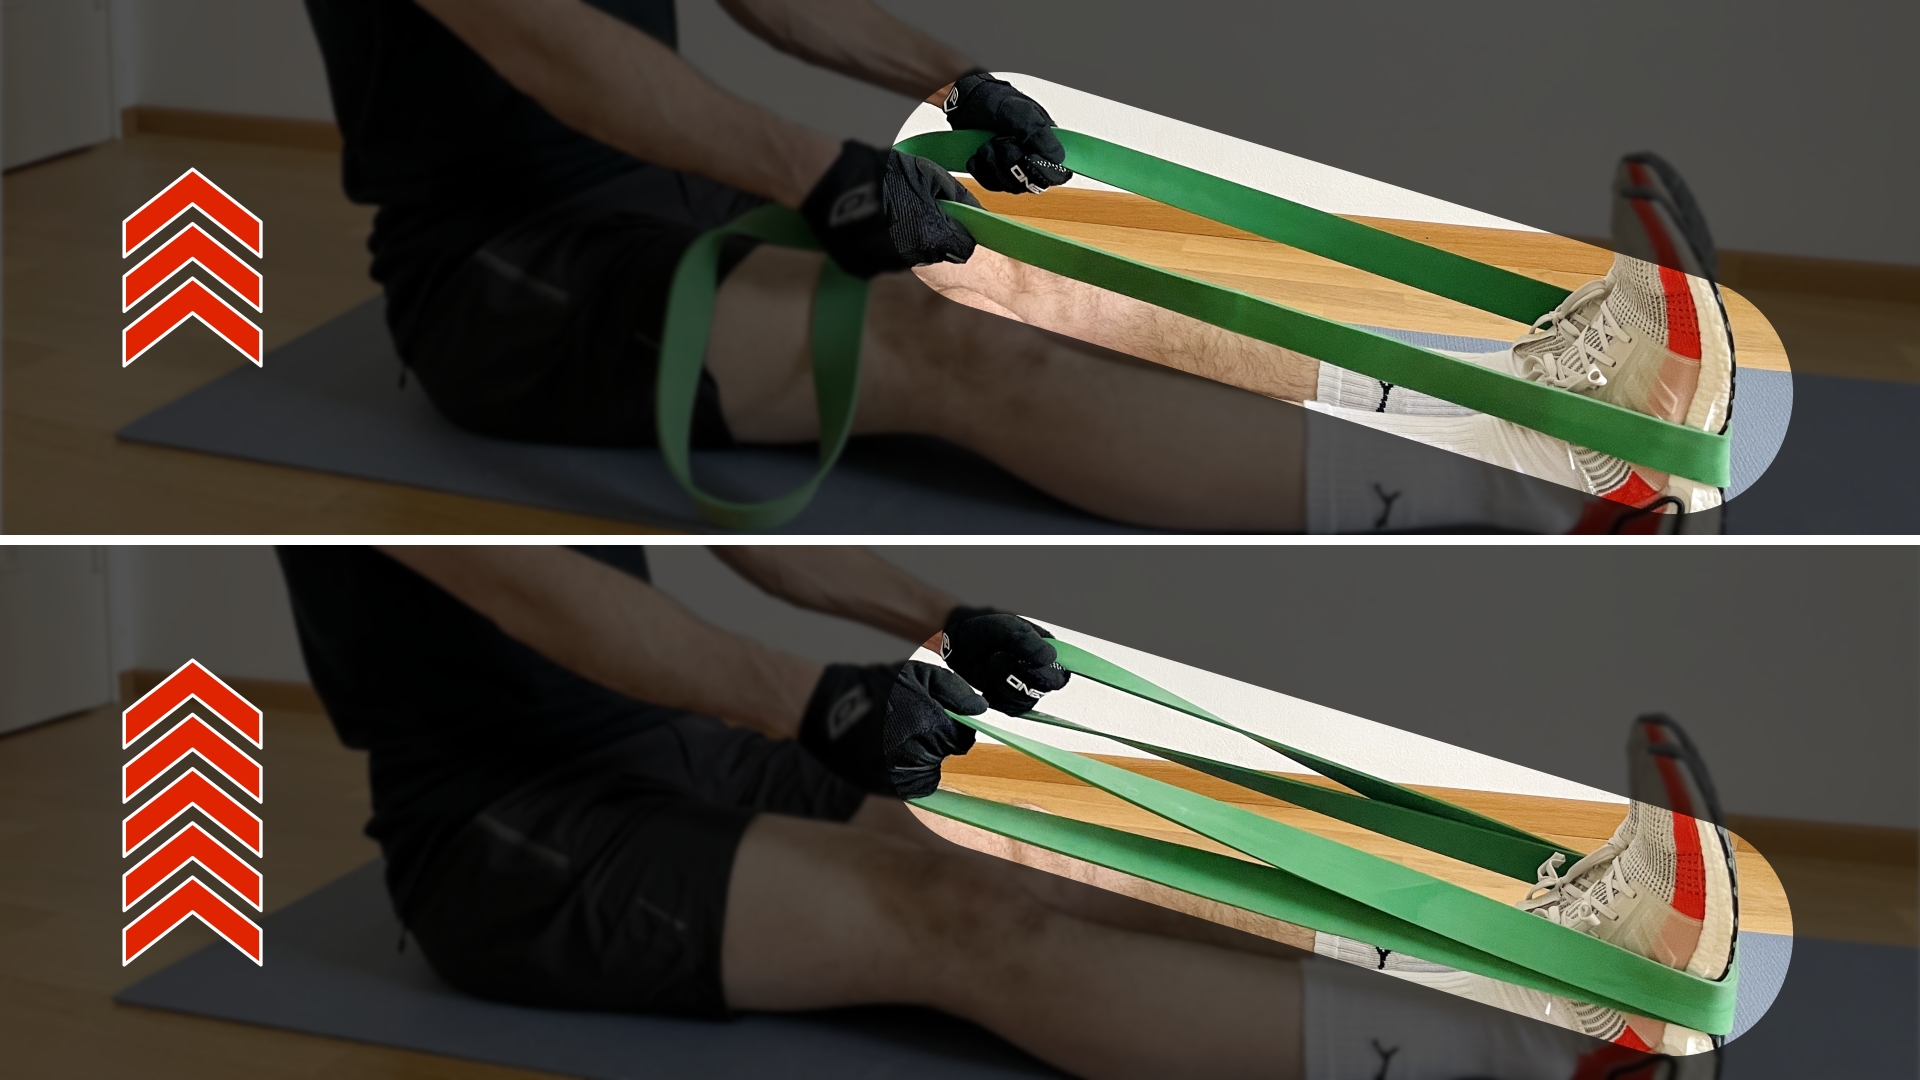
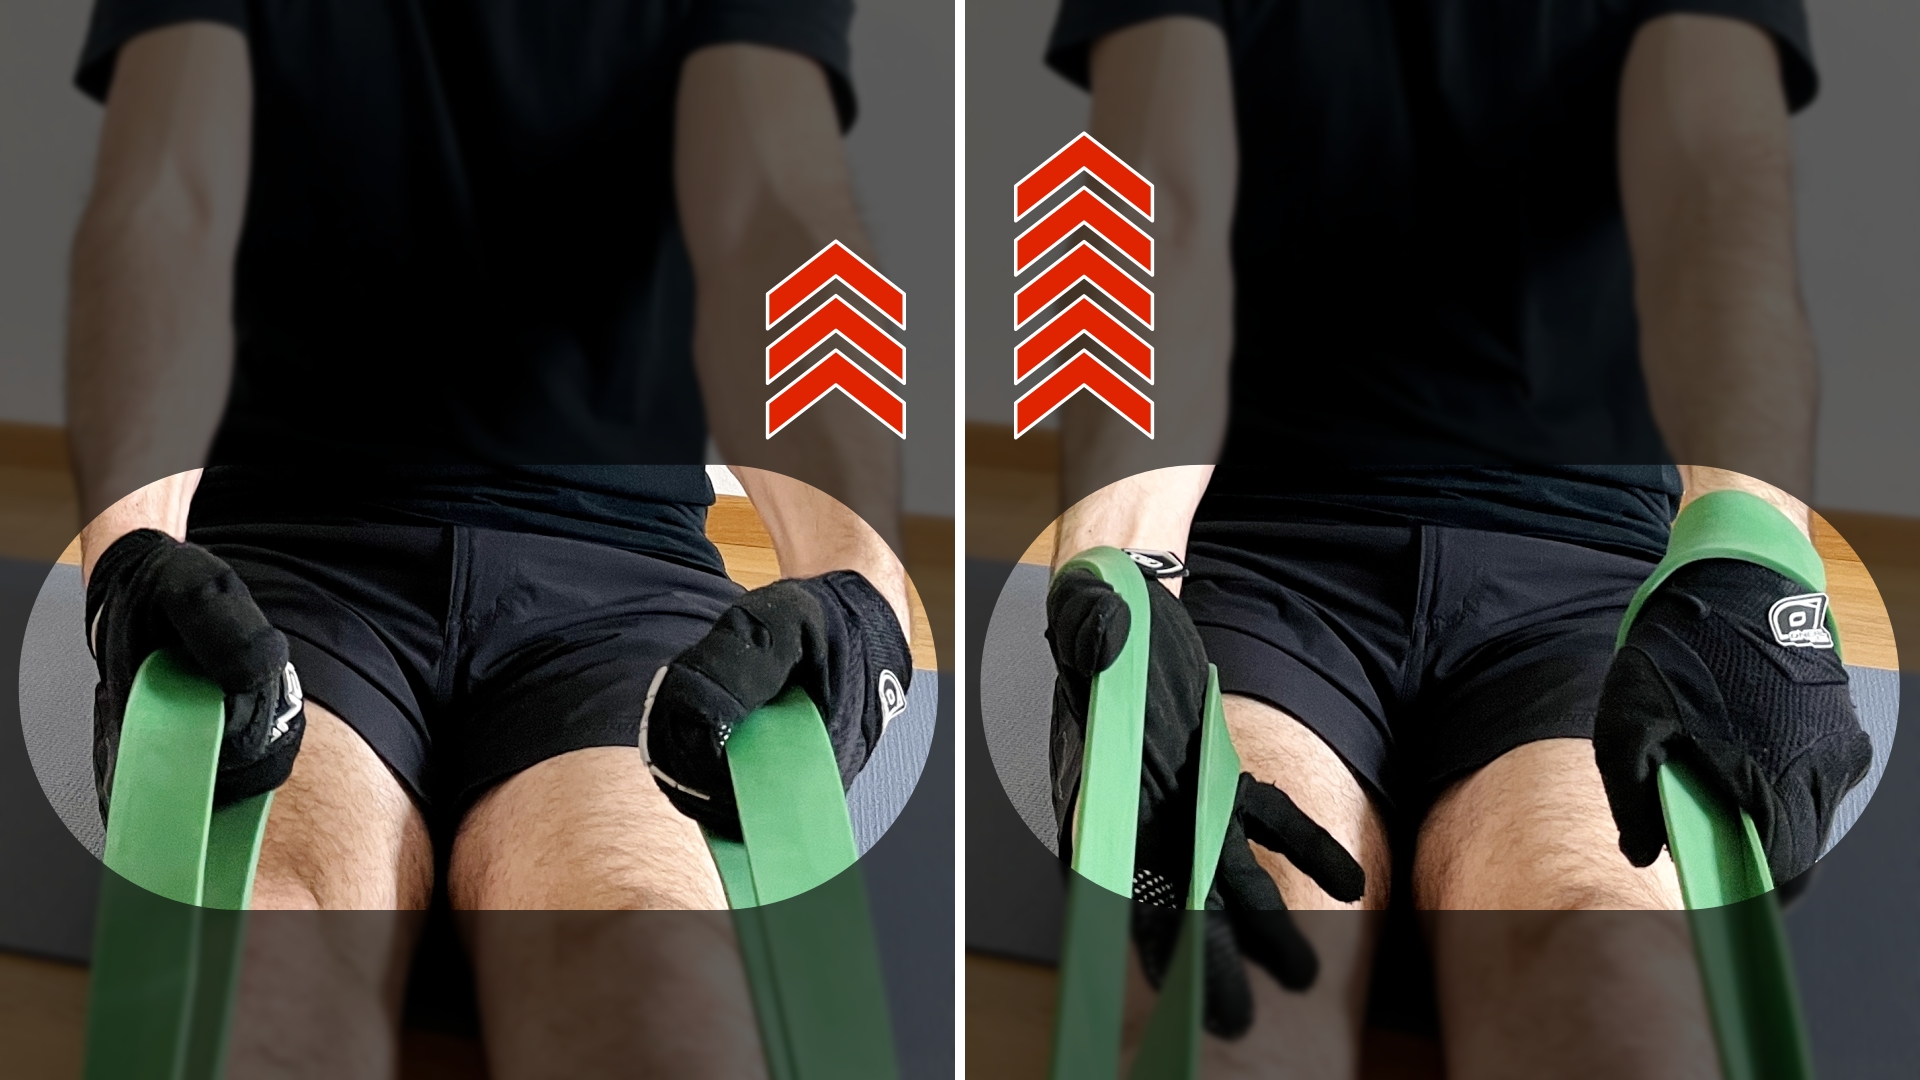
Shorten The Band – Another method is simply shortening the band. This will make the effective length of the band shorter, therefore you will have more resistance in the beginning and the end of the movement. This way you can add only a little more resistance without going overboard and compromise execution form. A great way for seated rows is to simply grab the band inside the loop. This will shorten the band and also give you a more stable grip.
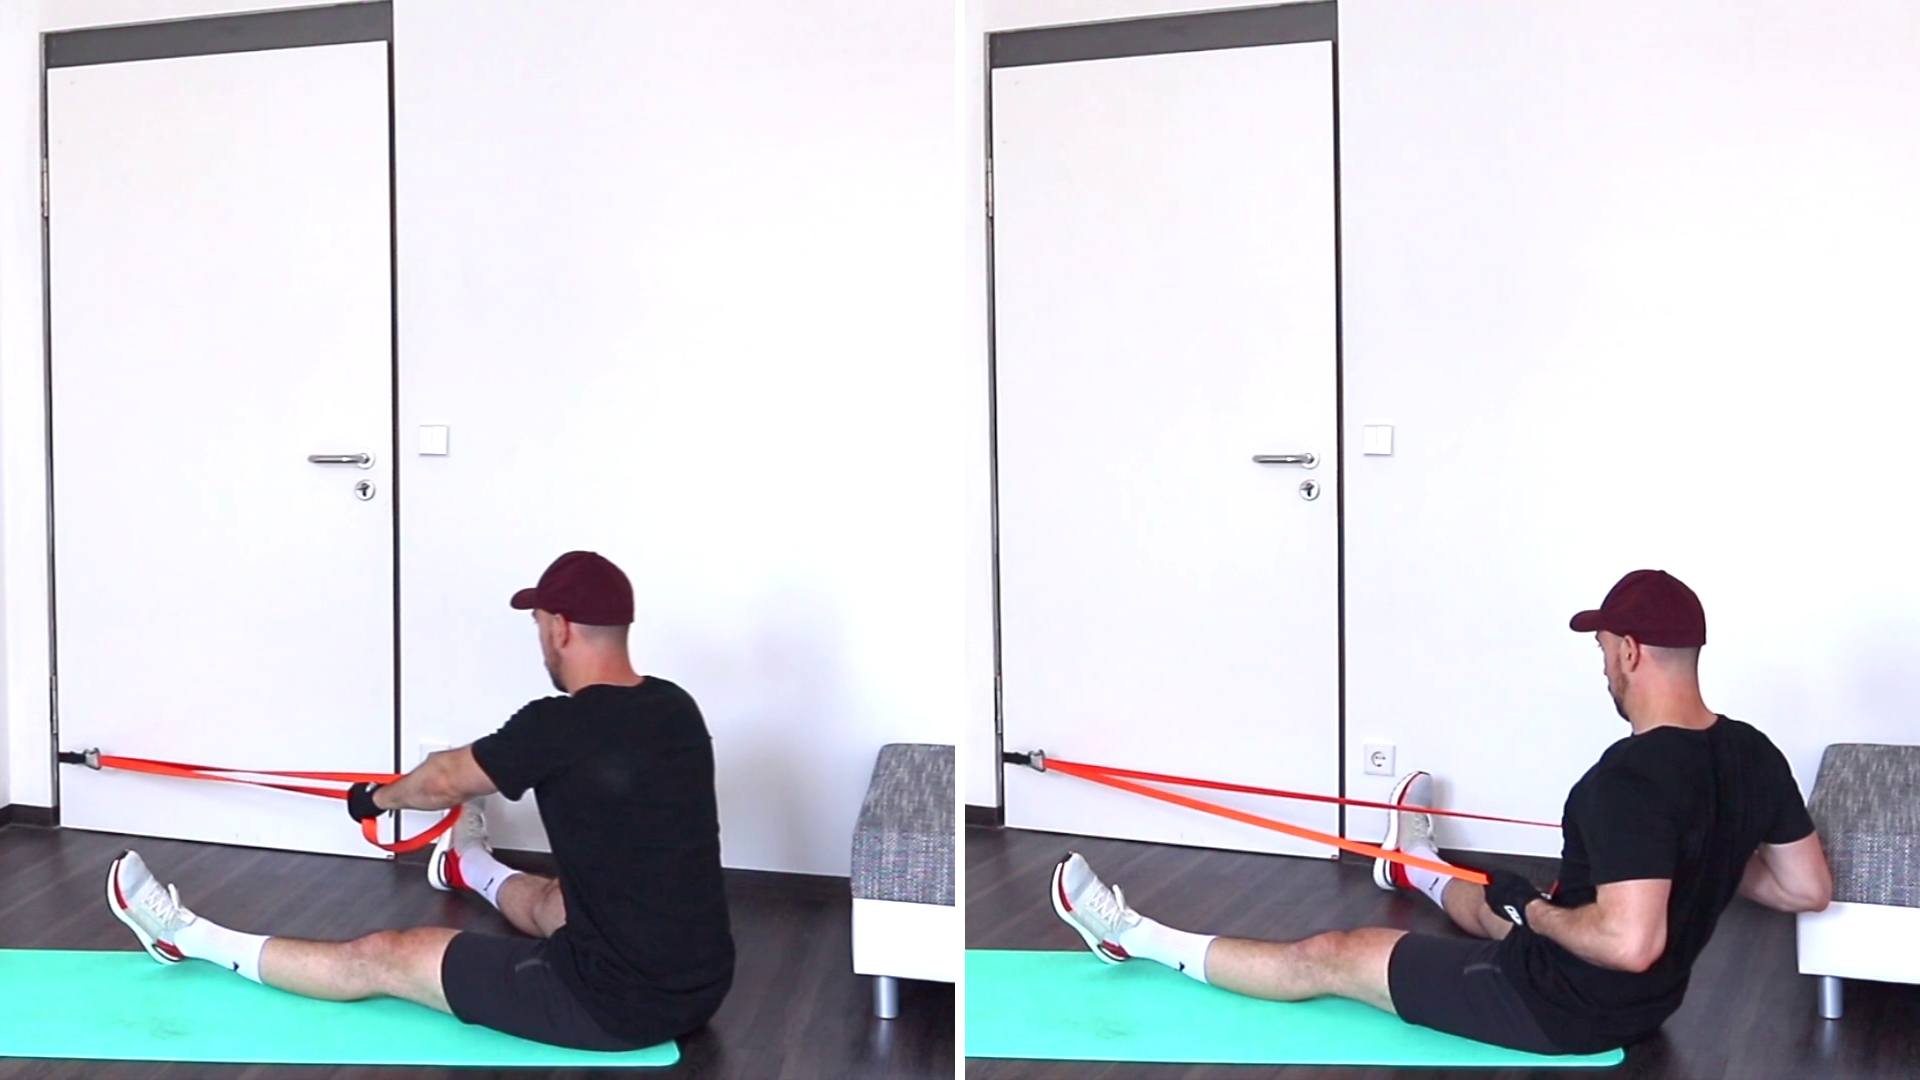
Use A Door Anchor – you can adjust the resistance simply by increasing the distance to the anchor point. Hopefully you can’t just make your legs longer, but you can use a door anchor. Attach the band to it and sit down on the floor with some distance to the anchor point. This setup is great because you can really fine-tune the resistance level by changing the distance, and also it is more comfortable on your feet. If you don’t have an anchor yet, get one a quick as possible – it will open tons of exercises and variations: Door Anchor
Double Time – If you feel that there is only a tiny bit of resistance missing and a jump to the next thicker band would be too much, simply add a lighter band as a second. It will give just that extra resistance you’re looking for without taking it over the top.
Exercise Speed – changing the speed of reps is often an overlooked or forgotten method to increase the intensity. The resistance stays the same, but by performing the movement slower, you make the row a lot more challenging.
Another way is keeping the exercise speed and the resistance the same, but adding a pause or isometric hold in the fully contracted position (elbows behind your body).
My favorite way to incorporate this is by doing alternating seated rows and while one arm performs the row movement the other one waits in an isometric hold. The following how-to video shows what I mean exactly.
Alternative Ways To Do Seated Rows With Resistance Bands
There are quite a number of different ways of how you can change this exercise. Incorporating variations of an exercise into your workouts is always a great idea. This way it doesn’t get boring, and you challenge your body and muscles with something new.
Changing The Elbow Position
You will always hit every muscle in your back when performing a row, but you can set a focus on specific muscles by changing the exercise form. Depending on the elbow position or rather the point where you pull towards, you can put and emphasis on the lats or the traps (and some rhomboids).
- Tight Elbows – Keep your elbows close to the upper body and pull towards the belly bottom, and you will feel your lats working the most.
- Flared Elbows – Flare your elbows and pull towards your chest, and you will involve the traps and rhomboids as the main working muscles.
Grip Positions
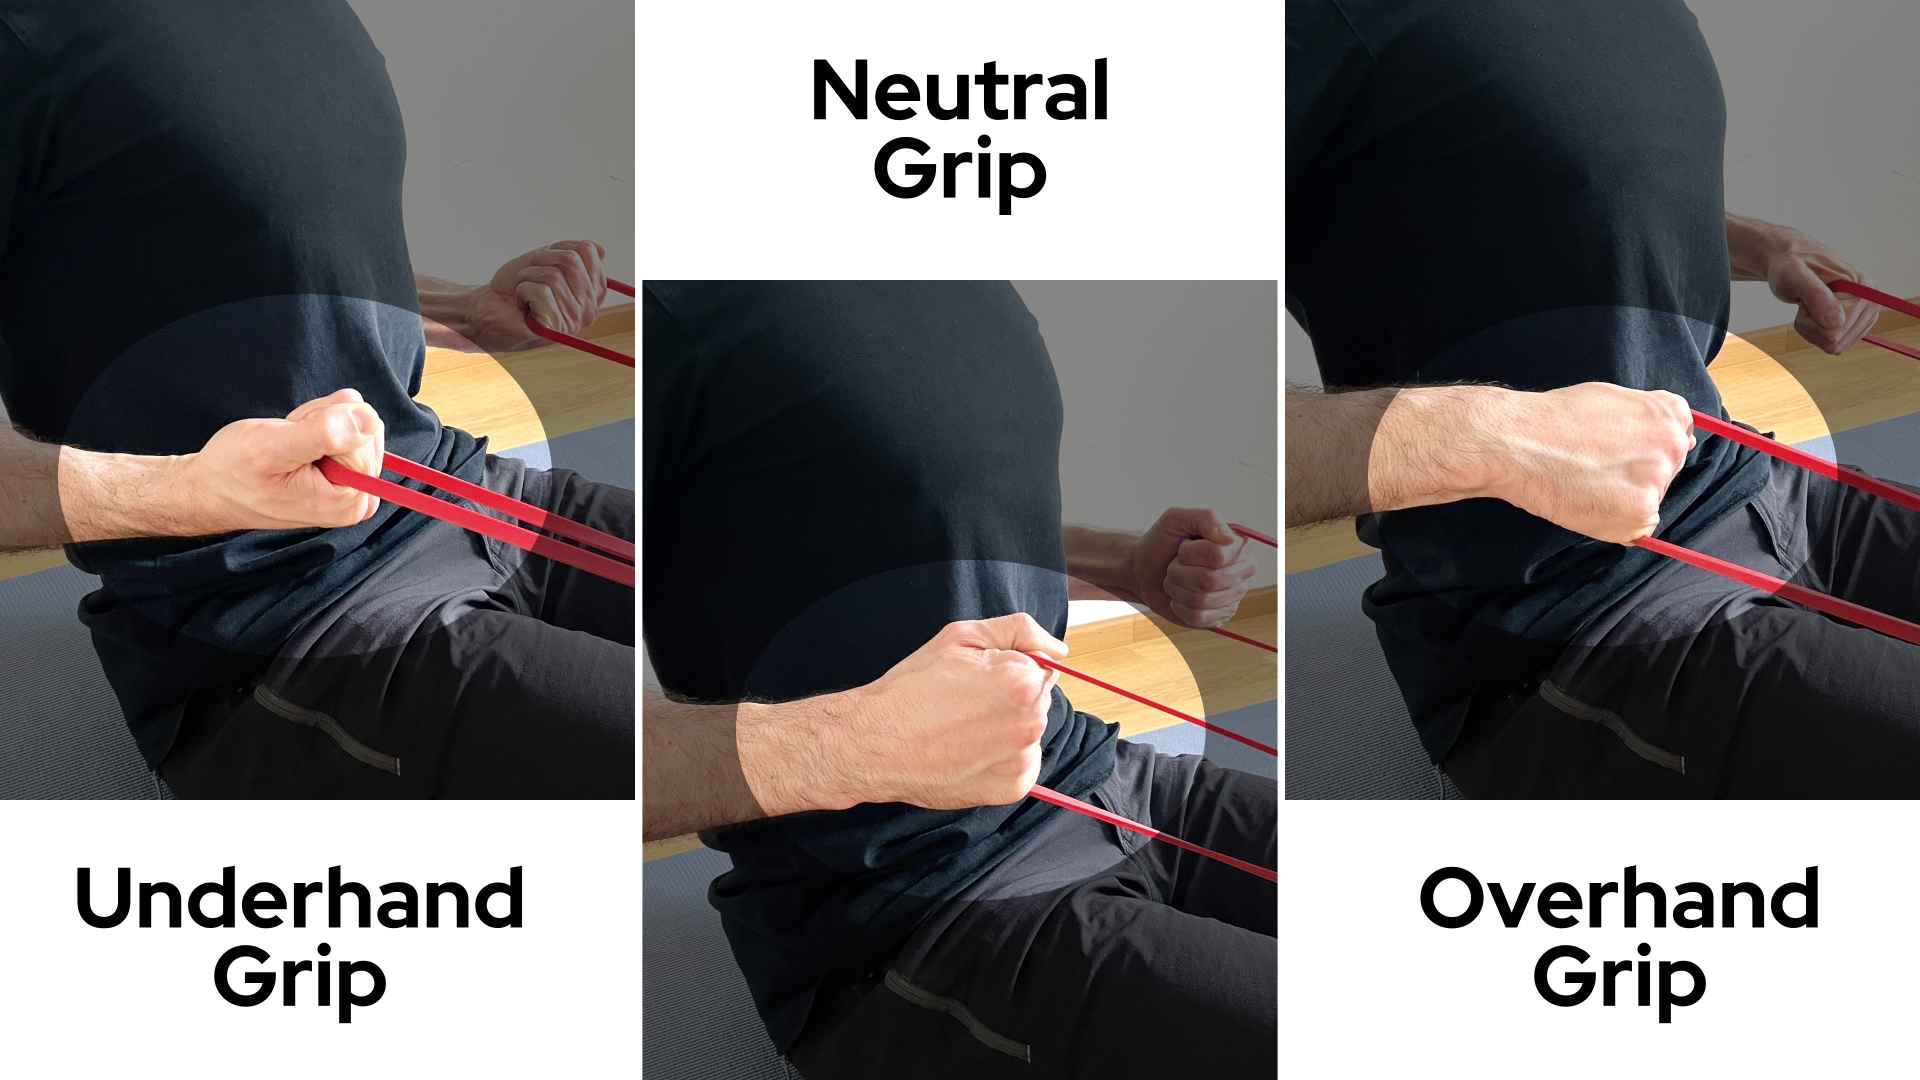
There are basically 3 different grip variations when it comes to seated row. By changing the hand orientation, you can slightly adjust to what level the involved muscles are stimulated.
- Neutral Grip – This is your most stable position. With this grip, you should be able to handle the most resistance. Most of the work will be performed by your back and your biceps is slightly helping. You can also use this grip for the flared elbow version.
- Underhand Grip – This will involve your biceps the most. Perfect if you want to sneak a bit of biceps work in your back workout. Or simply to pre-exhaust your biceps in your back portion of your workout before hitting biceps directly. It is not suitable to be used with the flared elbow version.
- Overhand Grip – This grip is perfect for the flared elbow row variation. But you can also use this grip for the lat variation of the row. This will have the least biceps involvement, and you will do most of the work with your back.
Alternative Row Variations To The Seated Row
Besides the seated body position, there are 2 other body positions you can do rows in.
Bent Over Rows – The bent over row is a more challenging version of the seated row. Your core and your lower body have to do quite some work to stabilizes your body throughout the movement. Especially, the lower back plays quite a big supporting role in this variation. To really fin out what to keep in mind in this row variation, check out the full article: Bent Over Rows With Resistance Bands
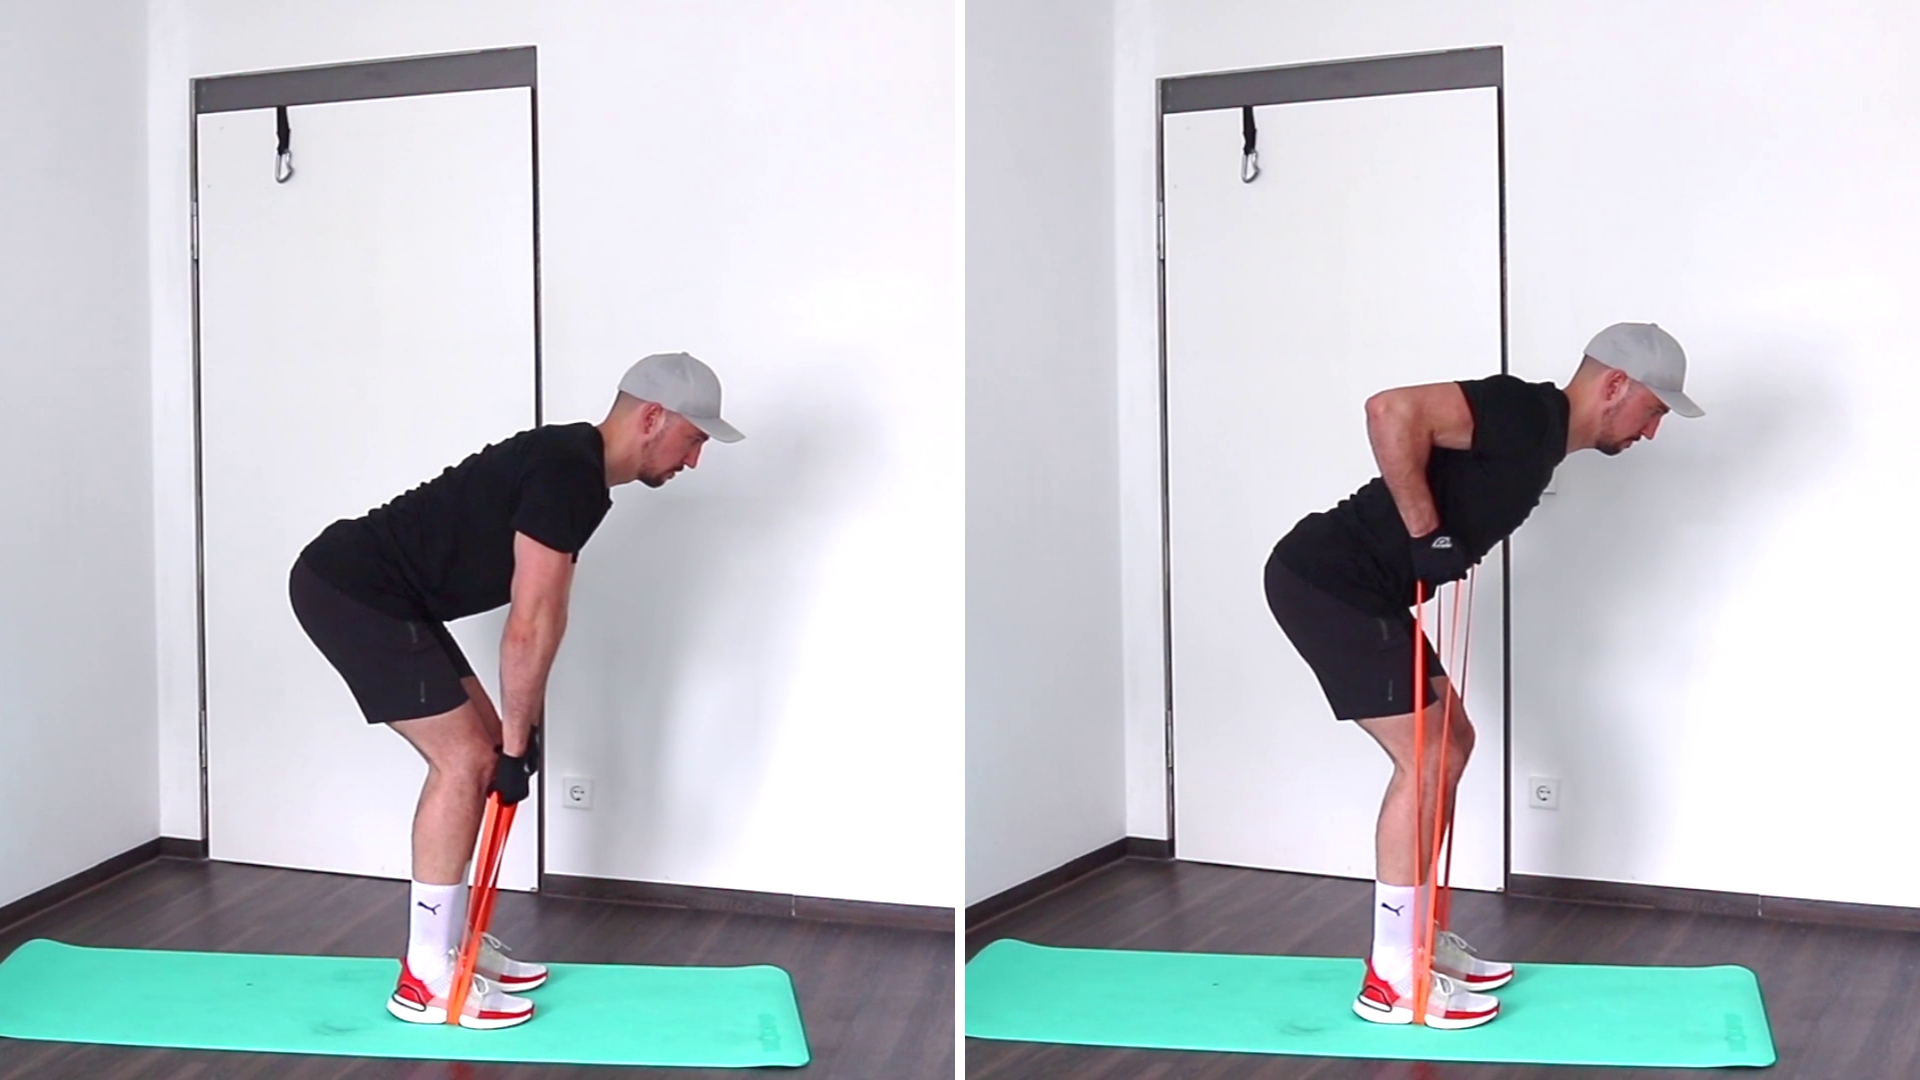
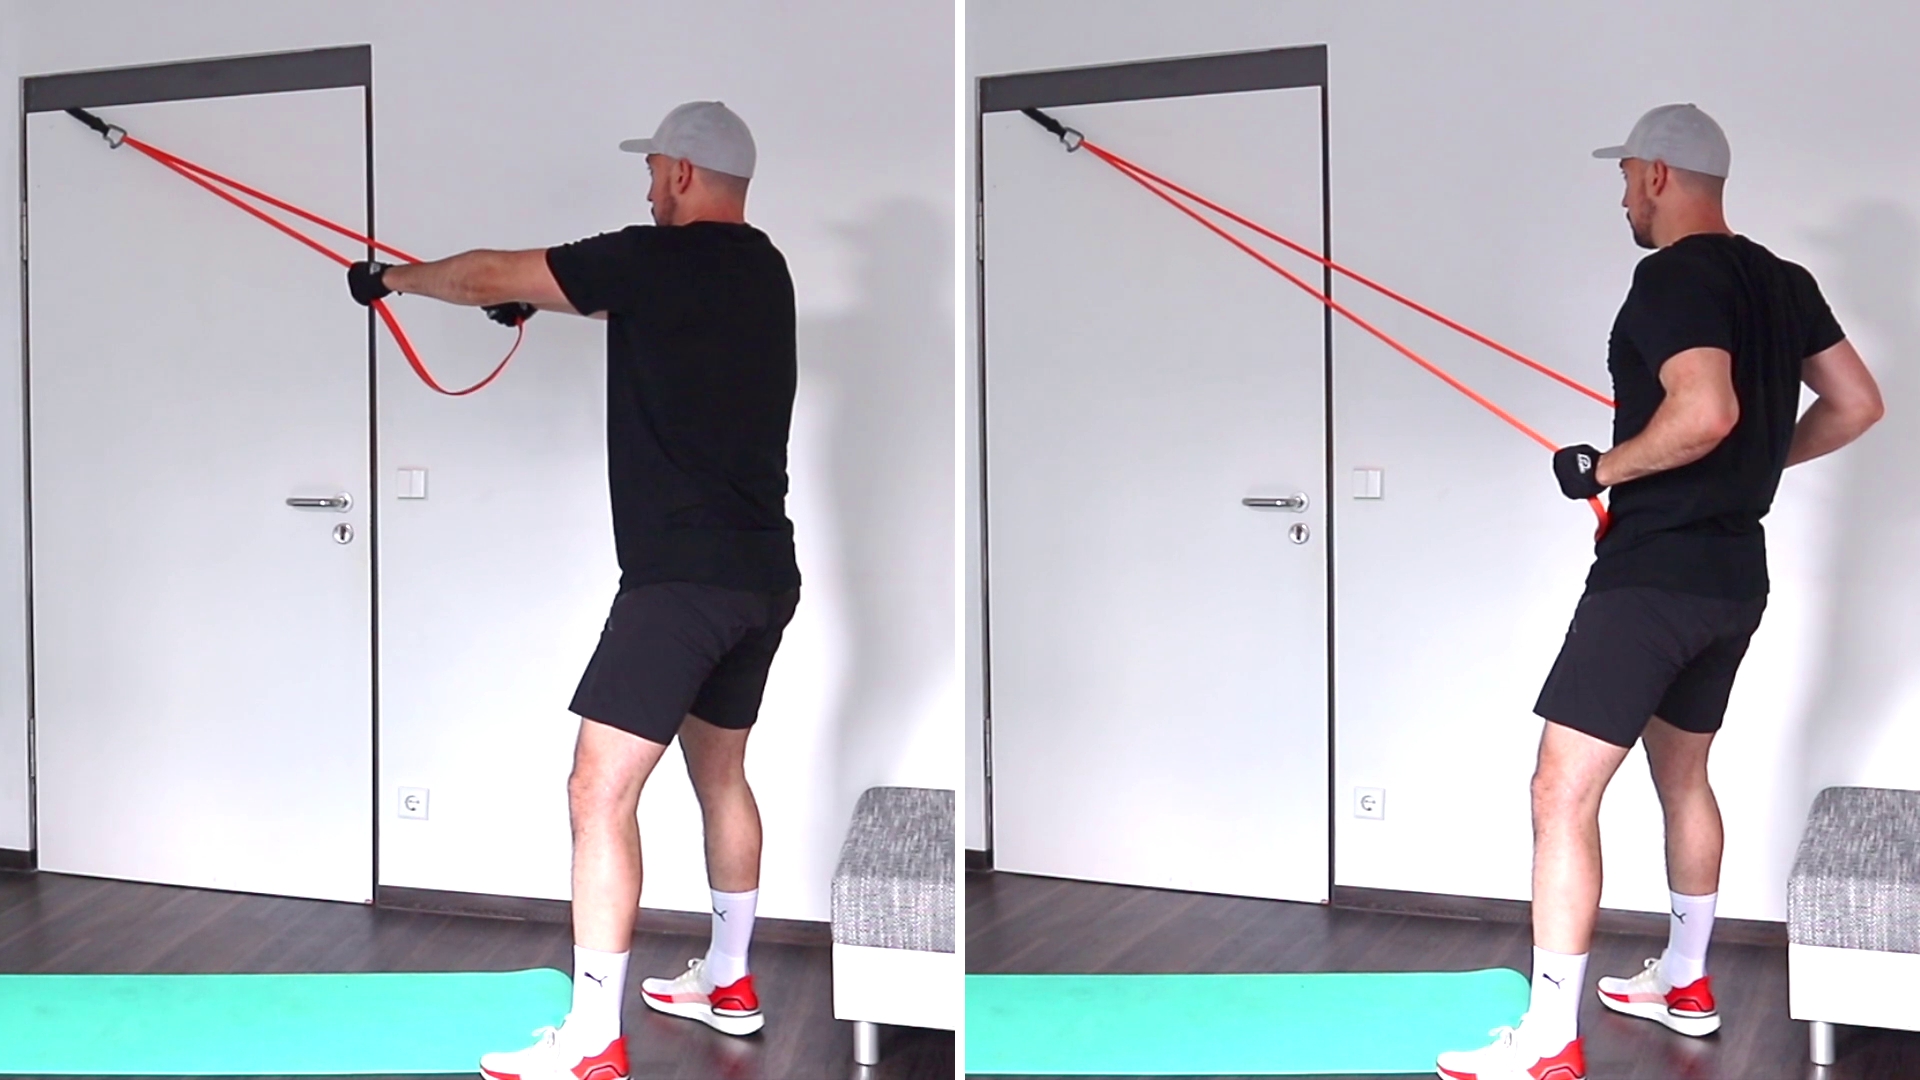
Standing Rows – Doing rows, standing up, is a very functional way of training your back. You won’t be in a sitting position while pulling something in your every day life too often. But pulling and pushing standing up are quite common movements we do throughout the day. A huge advantage of this variation is the option of adjusting the resistance by simply taking a step backwards – to increase the resistance – or forwards – to lower the resistance.
Find out more in the full article: Standing Rows With Resistance Bands