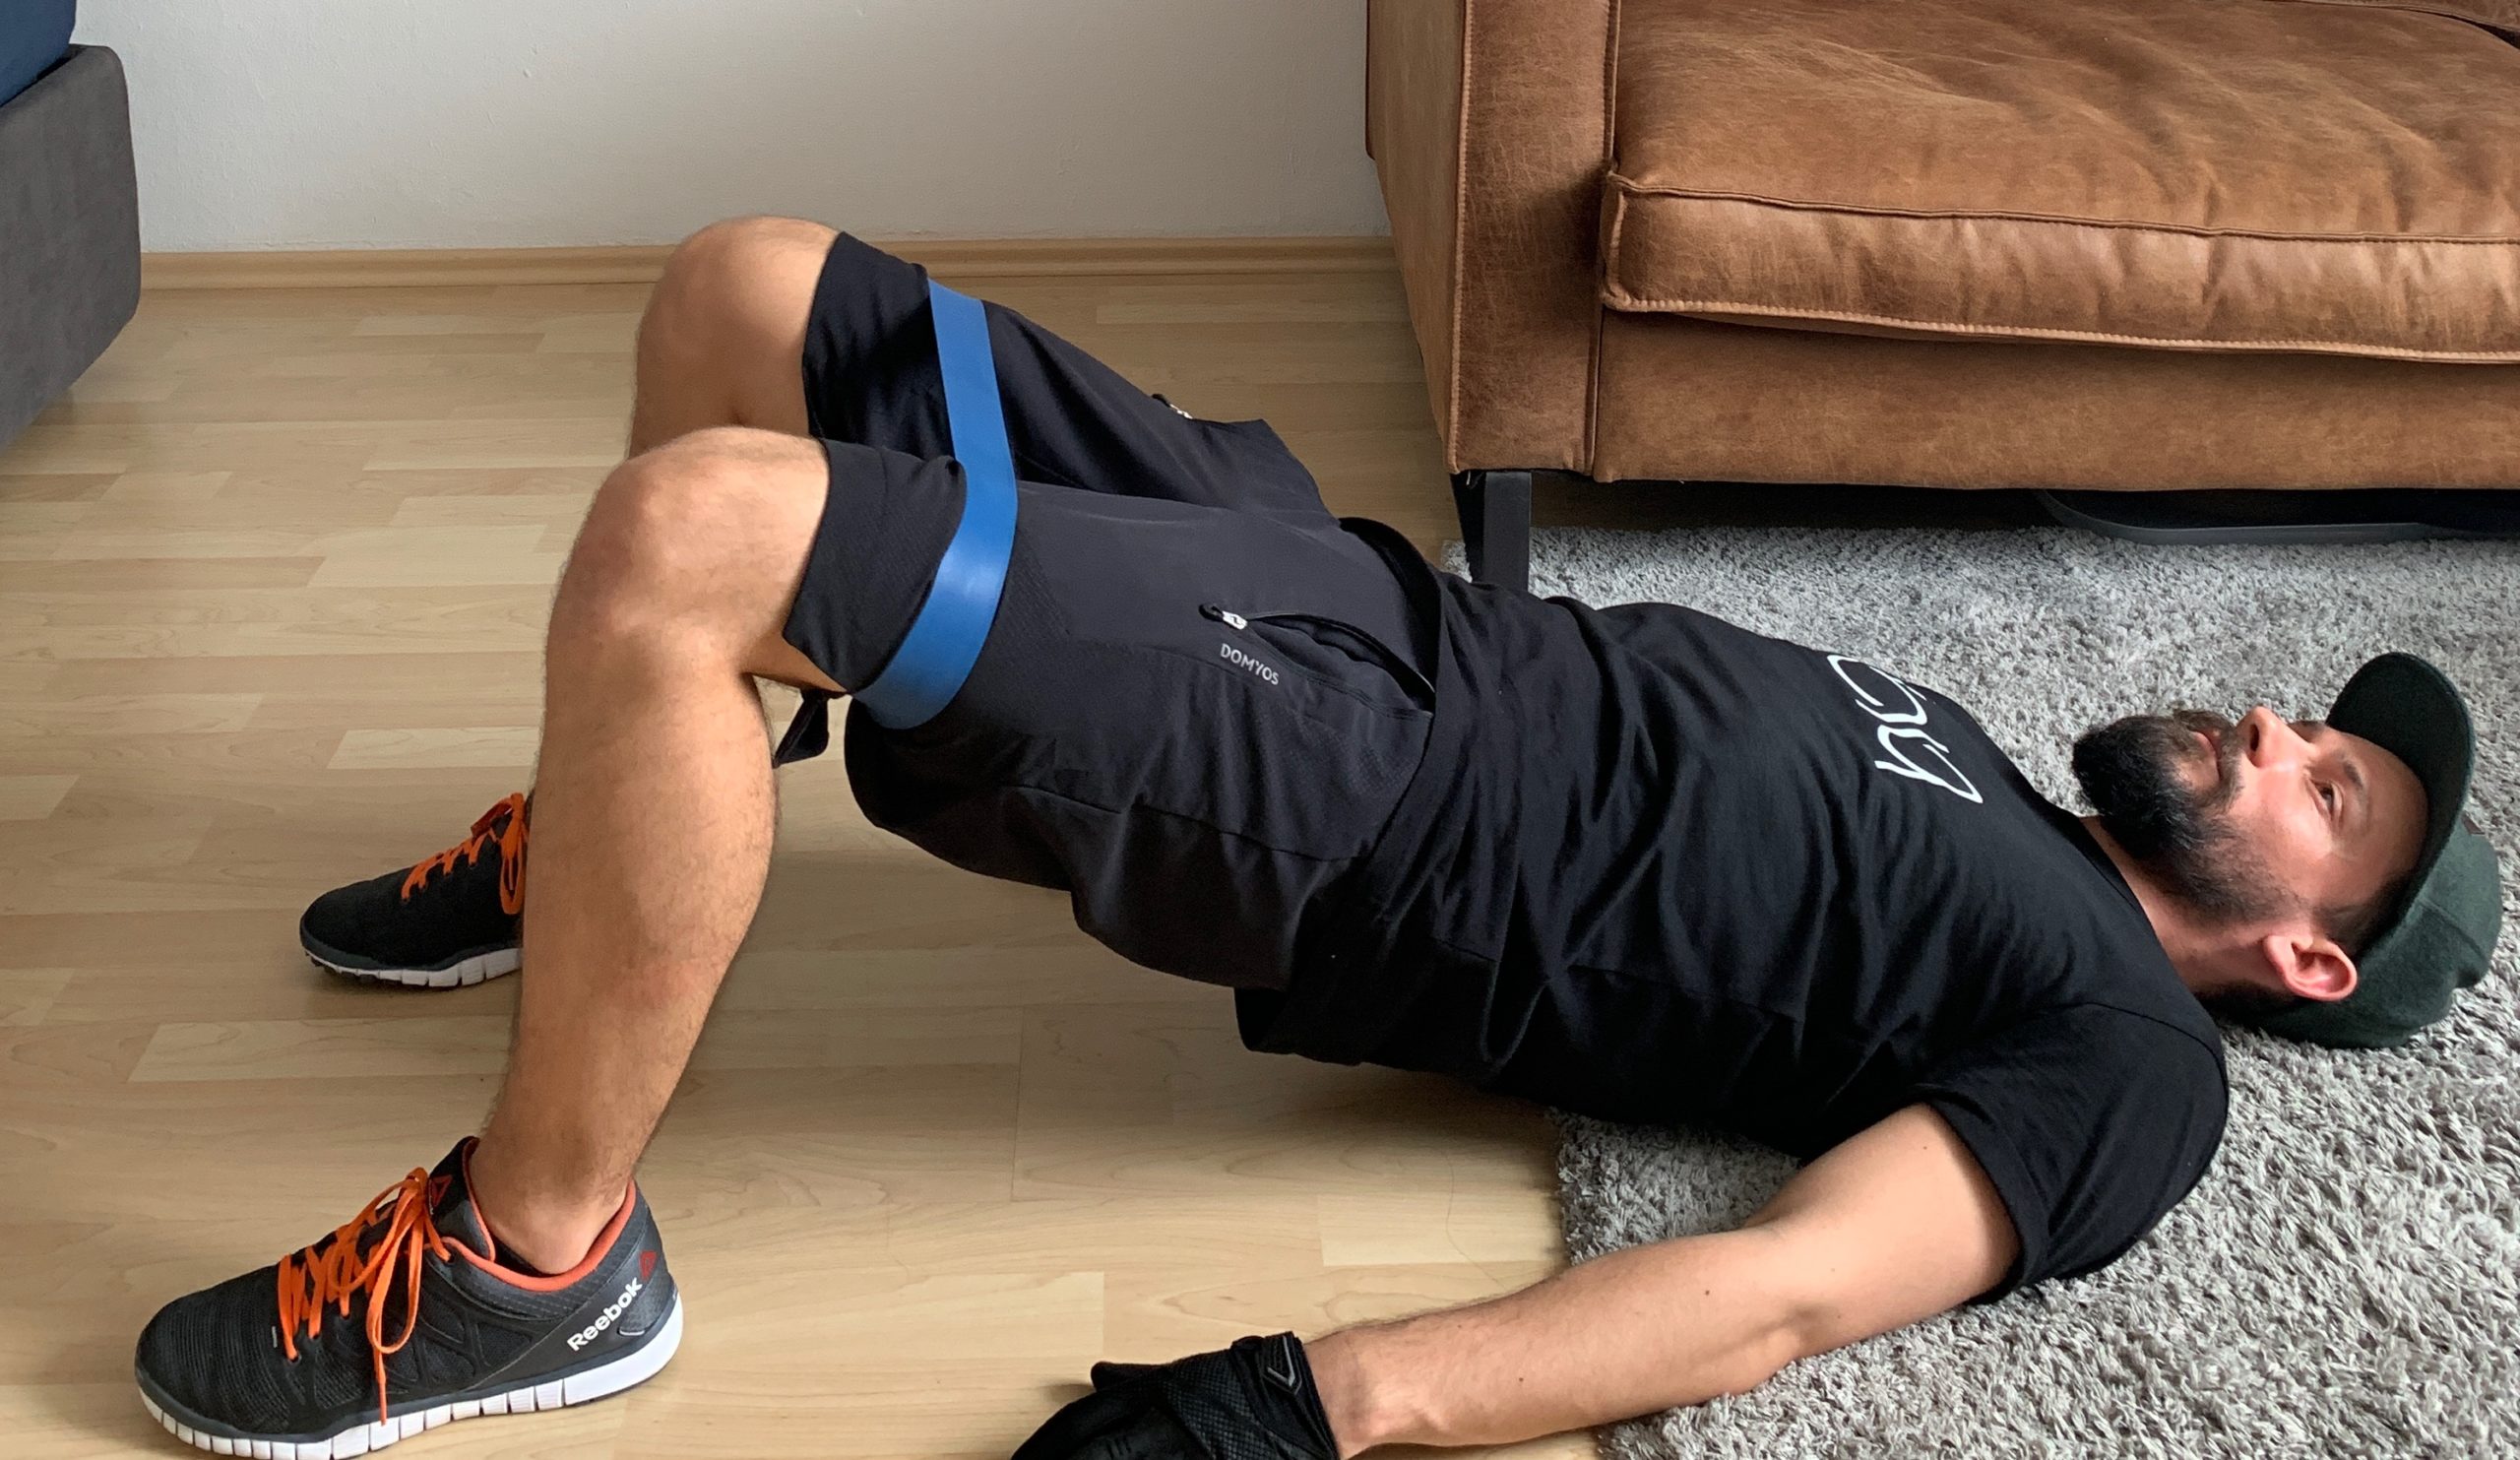
Glute bridges are a great way to warm up your body for some heavier lower body work or to work on your stability. Especially if you’re recovering from an injury and it healed already enough that you want to get into some simply and light movements. If your goal is to build some more mass on your glutes we highly recommend you our hip thrusts guide. There you will learn how you can overload your glutes with higher resistance.
In this article we will show you how to perform glute bridges with resistance bands, how you can modify them and what the little tweaks are you have to focus on.
Glute Bridge With Resistance Band
Now let’s jump right into how you do glute bridges with resistance bands.
Band VS Weights & Machines
Glute bridges are a great warm up exercise and the resistance bands are simply a tool to get your muscles ready for some heavy work. A misconception is that the heavy work has to be done with weights or machines. This couldn’t be further from the truth if you use resistance bands the right way and know how to perform the exercises. Here are some advantages resistance bands have over weights and machines.
- Don’t leave results on the table! You are leaving results on the table by using either the wrong resistance bands or the wrong workout plan. No worries, we got you covered – take our free workout plan tailored for your goals here and make sure to check out our perfectly tuned set of resistance bands here.
- Follow the natural strength curve of your muscle! The resistance of a band will always increase the more you stretch it and that’s also the natural strength curve of your muscle, having the most power in the full contraction. With weights, you often fatigue in the expanded part of your muscle without fully fatiguing the whole muscle.
- Stability, control & core! When you do work with a band, your body needs to hold the band in more than one direction so you will also work a lot on your stabilizing muscles and your core as well.
- Variations & Home Workout! You can not only do a warm up with bands, but there are exercises for your whole body which you can overload as good or better than with weights.
- Joint Friendly & Less Disbalances! When using a bar or machines you’re more fixed in your hand position and put more stress on your joints while bands let you get in a more natural hand position and prevent injuries.
There are also more reasons to favor resistance bands over traditional free weights or machines, like reducing the stress on your joints, getting more peak contraction, and many more. But we’re talking here about doing some glute bridges, so if you’re interested in background info about what benefits resistance bands give you in strength training and bodybuilding, check it out here.
How To Do Glute Bridges The Right Way
Now we will show and explain to you the most basic form of glute bridges. Further below you will find variations which make this exercise a bit more challenging and require more balancing.
Using a mini resistance band in this basic version is great to get more activation in your butt and the smaller lateral leg and hip muscles. Place the band slightly above your knees.
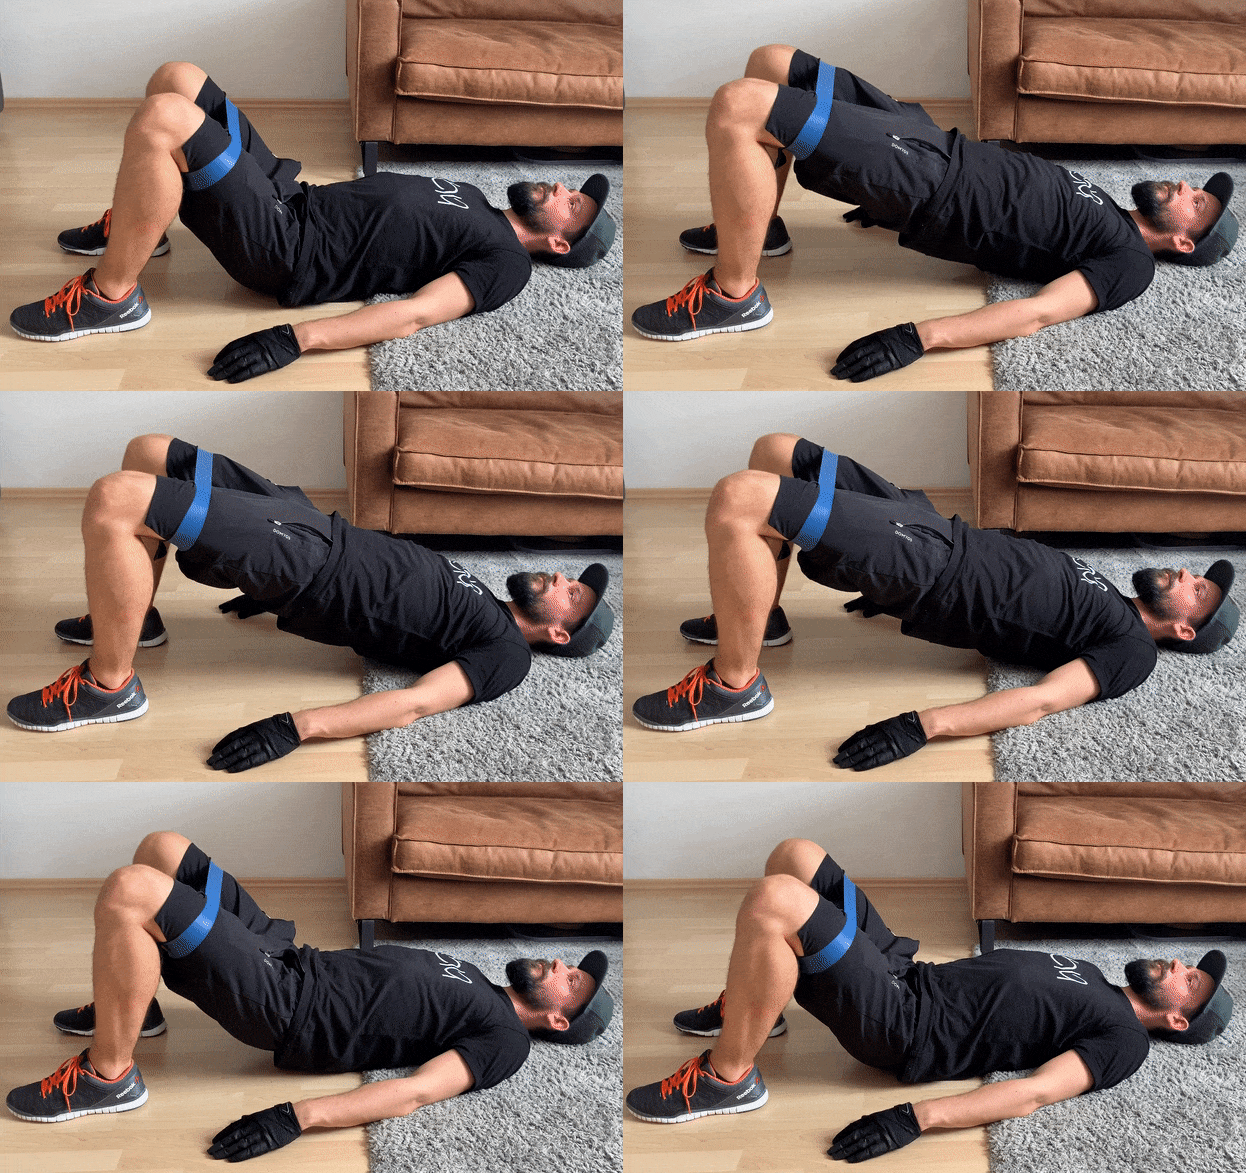
Now let’s get down to business. The basic steps of a glute bridge:
- Lay down on the floor and place your arms to the side of your body
- Bend your knees and place your feet half a foot away from your butt
- Now lift your butt until your upper body and your thighs form a straight line
- Hold this position for a second
- Lower your butt until it touches the ground and lift it up again for the next rep
Important Do’s & Don’ts!!!
We collected some important point to keep in mind while performing glute bridges and get the most out of them.
⓵ Knees Width – Push your knees actively outwards and keep them at shoulder width.
⓶ Core And Glutes – Two key muscles you want to be active in this exercise are the glutes and the core especially your lower back. The best way to make sure that is actually happening, is to consciously focus on your glutes and core. This alone will give you more activation.
⓷ Don’t Overextend Your Lower Back – Taking your hips to the point there your upper body forms a straight line with your thighs is enough. Don’t push your hips even further upwards. This will overextend your lower back and put unnecessary pressure on your spine.
Breath – I shouldn’t be telling you this but it actually quite easy to forget. This mostly a warm up exercise so you don’t have to brace. Keep your breath steady and take big breaths in and out.
We have the best workout plan for resistance band training out there - and you can get it for free!Answer the 4 questions below and we send it to you, no strings attached!
Alternative Ways To Do Glute Bridges With Resistance Bands
With every version of an exercise, you will find people that really like it and others that don’t like it that much. We will show you some more challenging variations you can try, incorporate in your warm up routine or even do a light workout with.
Resistance Glute Bridges – This is perfect if you want to add some resistance into your warm up or simply do very light version of a hip thrust. Grab a light regular loop band and get into the loop. Place the band on your hip and press it down with your hands against the floor. Now perform the glute bridge as described above.

Doubled Band Glute Bridges – With this set up you can add even more resistance. Grab a light regular loop band. Double it up and put each foot through one of the end loops. Now place the band over your hips and perform the glute bridge.

Bend Single Leg Glute Bridge – This is great for a little more balance work and more glute activation. Grab a mini loop band and place it over your feet. Now you have to choices how to do this version. You can lift one of your legs to the knee level of the other and perform active glute bridges by moving your hips up and down. Or you can do an isometric glute bridge by holding your hips in the top position. Then either lift one leg for a couple of reps and then the other or alternate the legs each time.
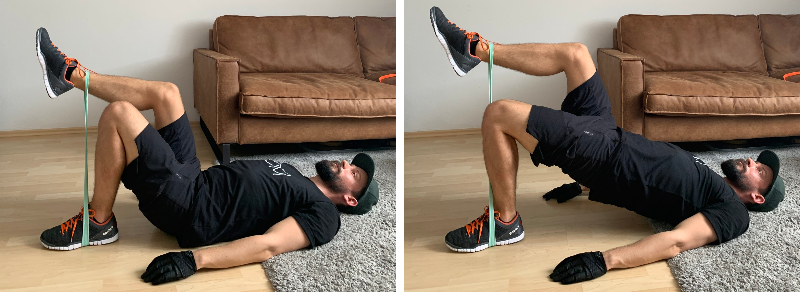
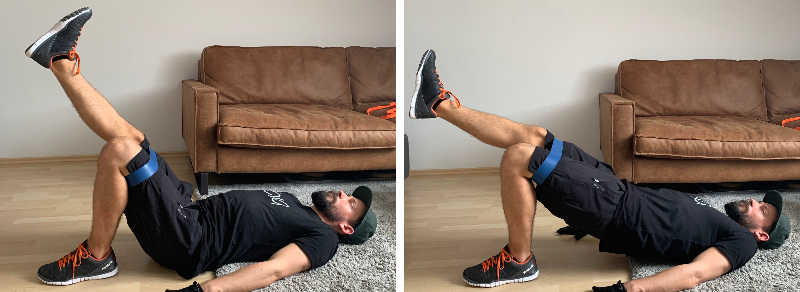
Straight Single Leg Glute Bridge – Now we come to the more challenging variations. This will have an isometric hold which will quite quickly let you feel a burn in your leg and you will have to focus more on your balance. Adding a mini band will make it even more challenging.
Place a mini loop band slightly above your knees. Lay down in the glute bridge position and straighten one of your legs so the thighs are parallel to each other. Now perform the glute bridge while keeping that leg straight. Change legs and repeat the whole process.
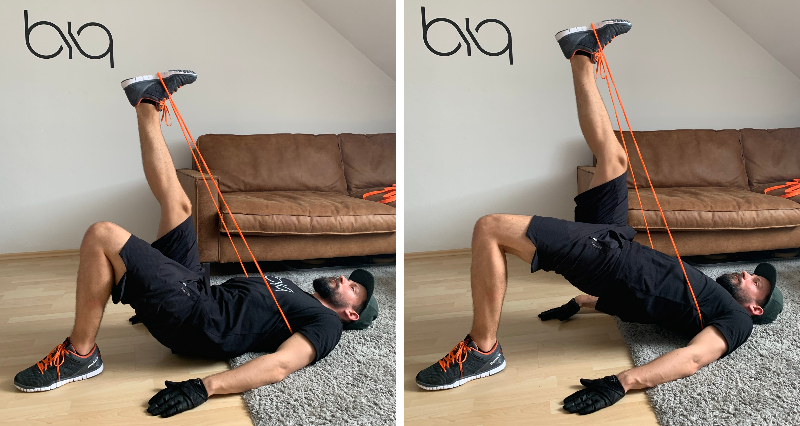
Single Leg Resistance Glute Bridge – This is the end boss. Single leg and added resistance. This will challenge your balancing skills and will definitely feel it in your glutes. There are 2 set-ups for this with a regular loop band. Either step on the band with the ground foot or lay down in the band with your upper back. Then wrap it around your other foot (the more wraps the more resistance). Now point that leg towards the sky and lets glute bridge. Great!
Time Under Tension
Compared to weights where you have the same force applied to any position of the movement, bands will add more resistance the further you stretch them – this will lower the time under tension your muscle has during a set in the starting position. Focus on doing the exercise controlled and try to hold it for a second or two in the fully contracted position and don’t let the band snap back but slowly go back to the starting position.
Full Lower Body Workout
Now we’ve done some glute bridges and got our muscles ready for some serious work – we have here a full lower body workout with different exercises that will challenge your glutes and legs as well as keep you healthy for years to come – check it out here.

